
Podcast Booths
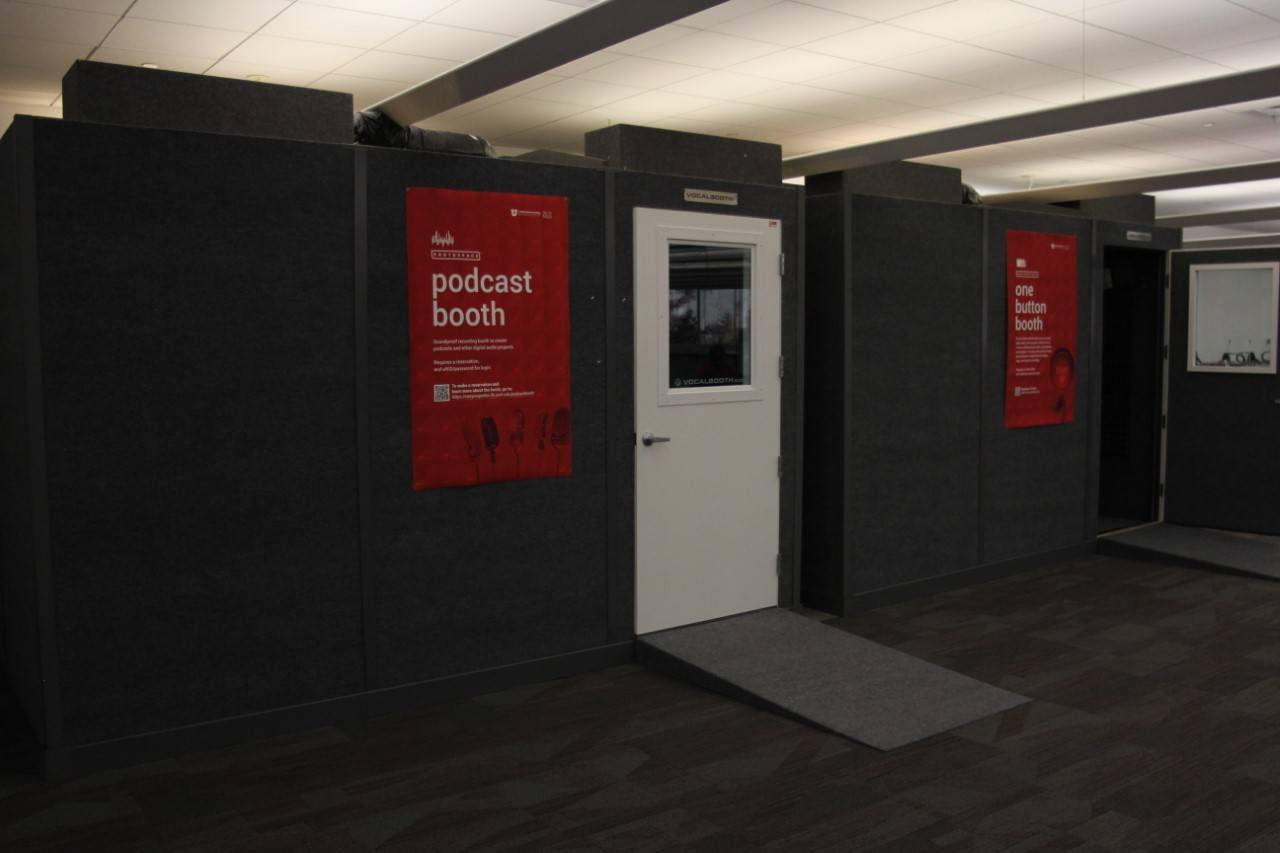
The Podcast Booths are self-scheduled, sound-proofed, audio recording spaces.
- Booths 2750A and 2750B are located in the Active Study Area on Level 2 of the Marriott Library.
- Available only to University of Utah students, staff, and faculty with a valid uNID.
- Accessible all hours the Marriott Library is open.
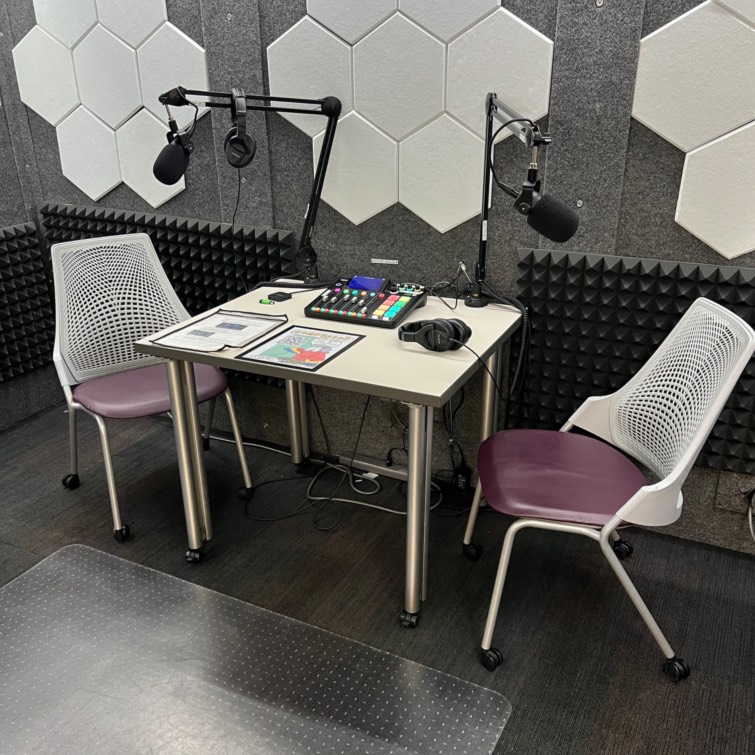
- Equipped with a RodeCaster Pro II mixer and two professional-grade Shure microphones on boom stands.
- Export audio files to a USB drive or record directly to a personal laptop.
Podcast Booths must be reserved to use.
Setting Up a Podcast
- Schedule a booth via the Library Scheduling System.
- Turn on lights using the remote on the inside wall.
- Close door completely.
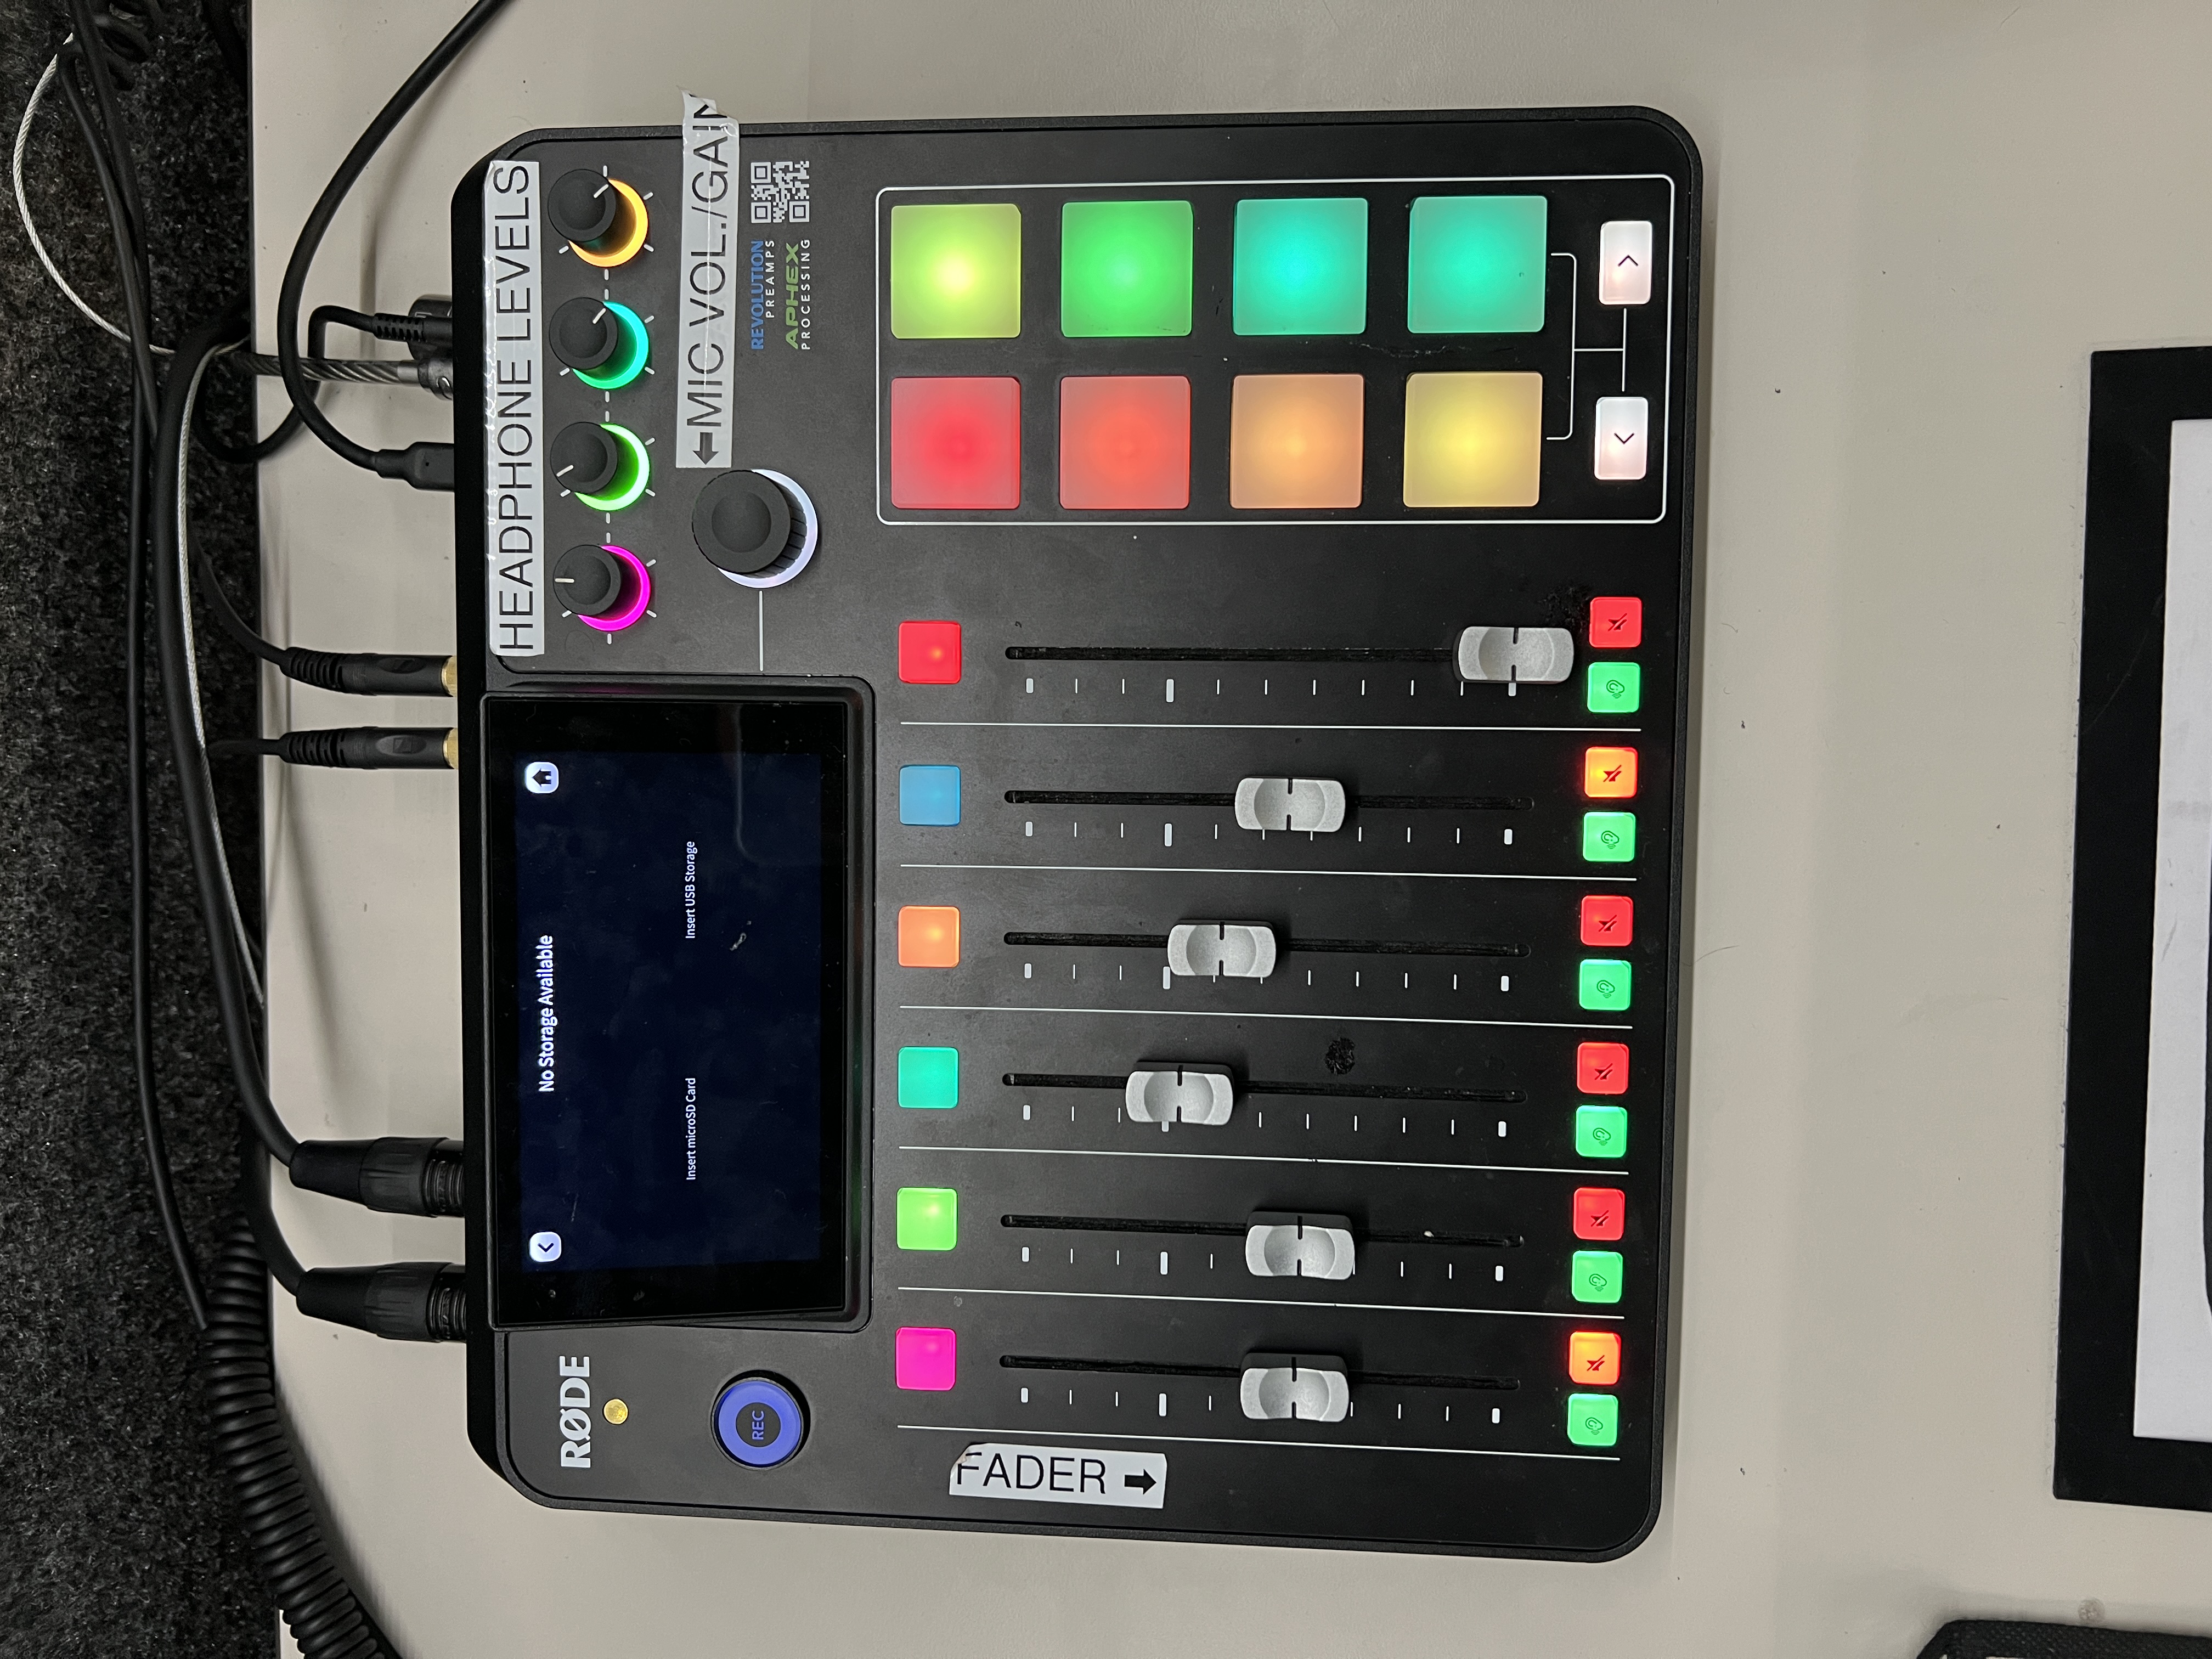
- Make sure RodeCaster mixer is plugged in, powered on, and the microphones' XLR cables are securely plugged into the back of the mixer and into the microphones.
- Plug in your external storage device:
- Use the external drive hub for USB 2.0, USB 3.0, and USB C 3.0 drives and cables.
- This is where your personal laptop can be plugged in!
- HDMI and SD cards slots, and a MicroSD option are on the back side of the hub.
- Use the external drive hub for USB 2.0, USB 3.0, and USB C 3.0 drives and cables.
- Set up each microphone separately:
- Microphone 1 is pink. Microphone 2 is green. For each microphone you will use, slide the corresponding slider up to the bold hash mark on the fader track.
- Tap the pink or green button to illuminate.
- In the pop-up window, scroll through the microphone options and select Condenser. (Do not choose the PodMic selection!)
- Make sure the microphone is "On" at the bottom of the pop-up window.
- Do a microphone check:
-
- Have the speaker sit where they will be during the recording session and bring the microphone near their mouth.
- While speaking, watch the green meter reading in the pop-up window. It should jump regularly into the green zone. Avoid the red zone, as it will cause distortion in the audio recording.
- Adjust the microphone input volume (gain) by tapping the + or - button until regular speaking lands the meter into the green zone. (The highest gain level is 70.) If the meter is not registering in the green zone when the gain is at 70, bring the microphone closer to the speaker's mouth and adjust the gain again.
-
- Repeat steps 6 and 7 for the other microphone, if using.
- You can monitor the recording session using the headphones. Adjust headphone levels using the button to the right of the pop-up window.
Recording a Podcast
- When you're ready to record, tap the green REC button to the left of the pop-up window.
- You will see the vertical recording levels for each microphone that is turned on.
- You will also see a timer showing the length of the recording.
- To pause the recording, tap the green REC button again. It will turn yellow. Tap the REC button again to turn it green to begin recording again.
- To stop the recording, press and hold the green REC button. It will show "Saving" in the pop-up window.
- Wait for Saving to complete before removing your external storage device.
Playback:
- Insert your external storage device into a computer and find the recording in the "Rodecaster" folder. Each recording will have a unique date and number.
Assistance
For immediate assistance, go to the ProtoSpace help desk on Level 1, in room 1750.
Email Robert Nelson, Media Studios Librarian, for consultations on basic and advanced podcasting and audio editing. As a music podcaster, he has accrued over 3 million minutes streamed.