Course Materials Guide
Getting Started
Marriott Library Course Reserve services are now offered through Course Materials powered by Leganto. Course Materials allows you to connect library owned content directly to your Canvas course, request the purchase of new material, and seamlessly include external resources into one list that you can link to your weekly modules and assignments.
This guide will tell you everything you’ll need to know to get started. If you have questions or need help getting started contact your Course Librarian.
Link Your Canvas Course to Library Course Materials
- Go to Canvas - Click on Courses, Select Course
- Go to Settings > Navigation > Scroll to Course Materials at the end of the list > Select Enable > Save
- Click the enabled Course Materials link in the Canvas menu to access the welcome screen
Create & Customize Your List in Course Materials
- Create a Title and Sections – Name your reading list and organize it into sections for better structure.
- Add Items – Click ‘Add Items’ to search for materials the University Libraries already own or upload files from your computer.
- Remove Citations – Select ‘Delete Item’ to remove a citation from the reading list.
- Use the Cite It Bookmarklet – Add the Cite It tool to your browser to include web resources. Ensure you are logged in for it to work.
- Request Materials – Suggest a purchase or submit a digitization request for additional resources.
- Submit for Library Review – When your list is complete, click "My List is Ready" for library staff to review.
- Integrate with Modules – Once Course Materials are finalized, you can add specific resources directly to Modules for student access.
Visual Walkthrough
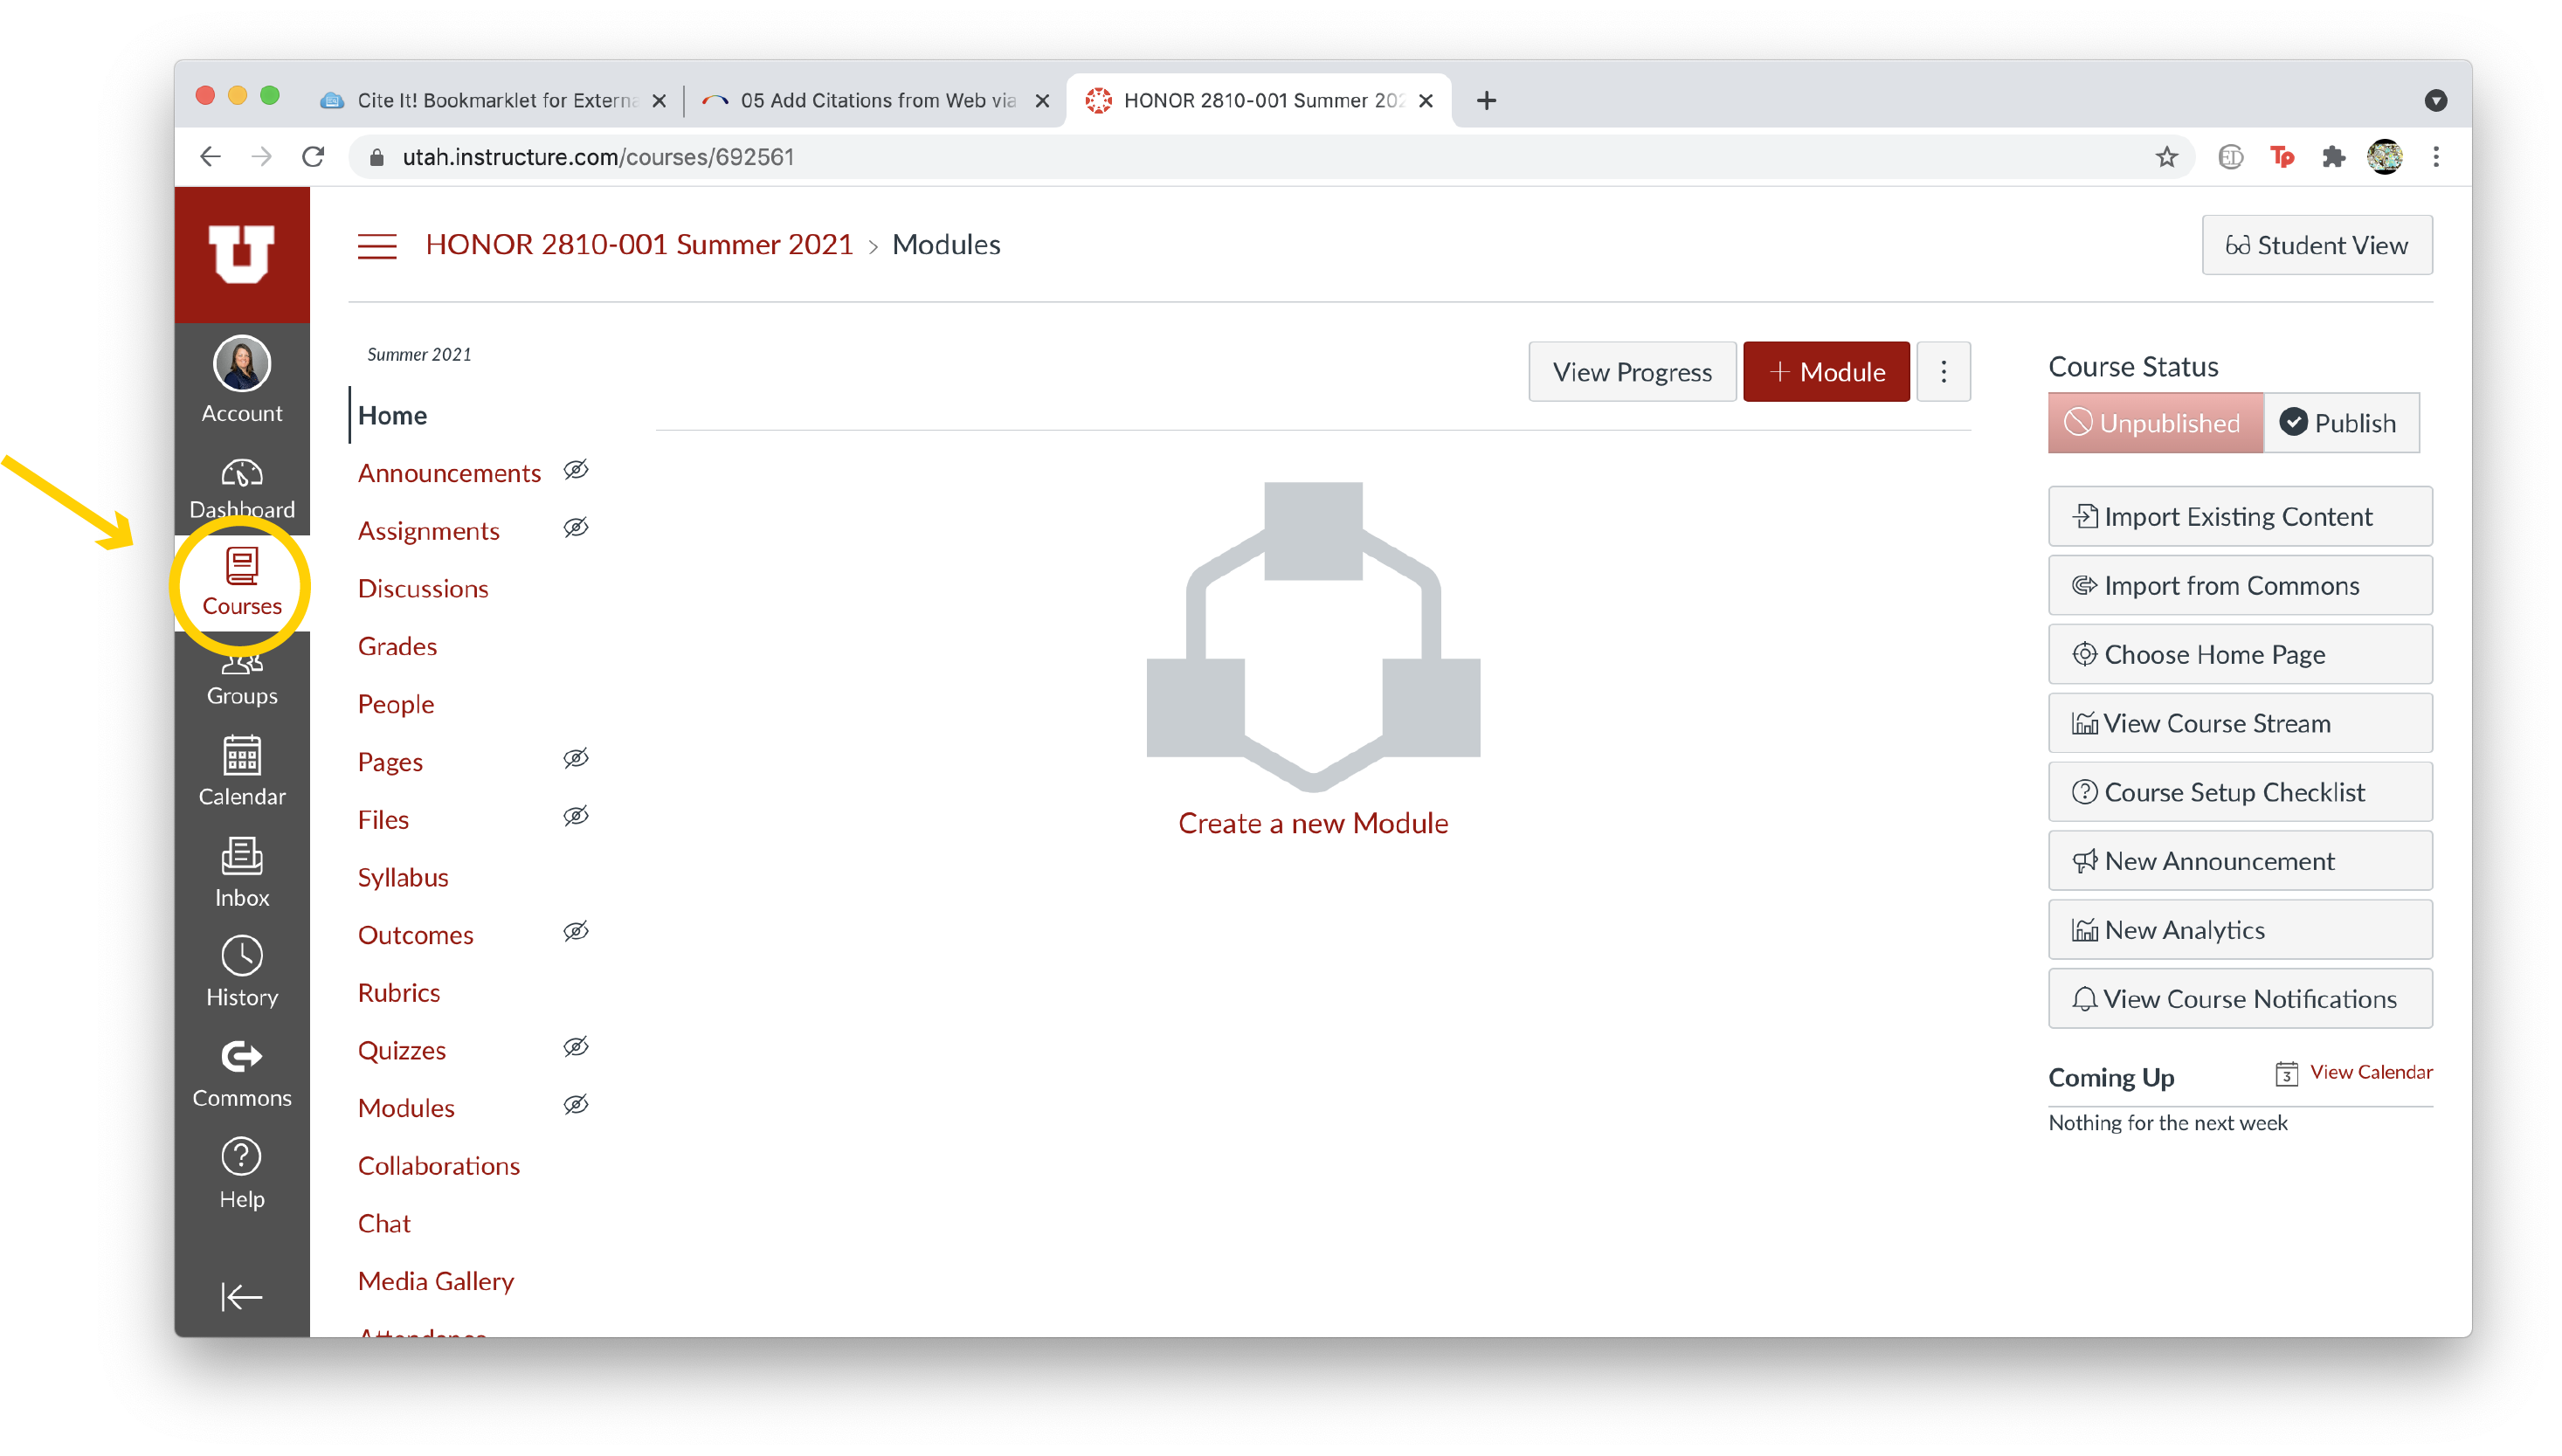
Canvas Navigation
- Go to Canvas
- Click on 'Courses'
- Select Course
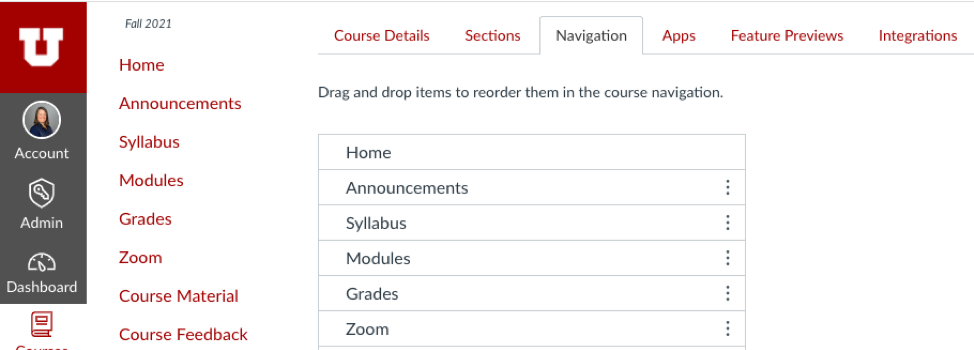
Enabling Course Materials in Navigation
- Go to Settings – Open the Settings menu.
- Navigate to the Navigation tab – Click on the Navigation section.
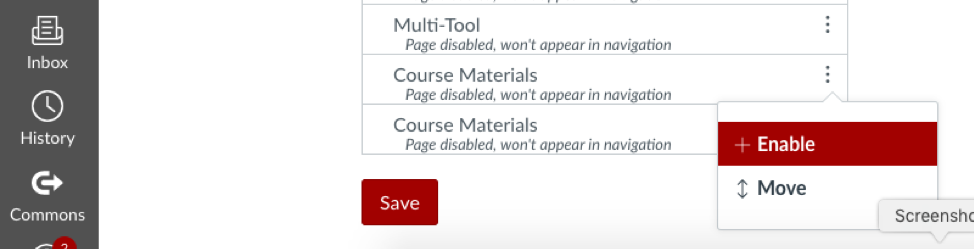
- Scroll to Course Materials – Find Course Materials at the bottom of the list.
- Enable Course Materials – Select Enable to activate it.
- Save Changes – Click Save to apply the changes.
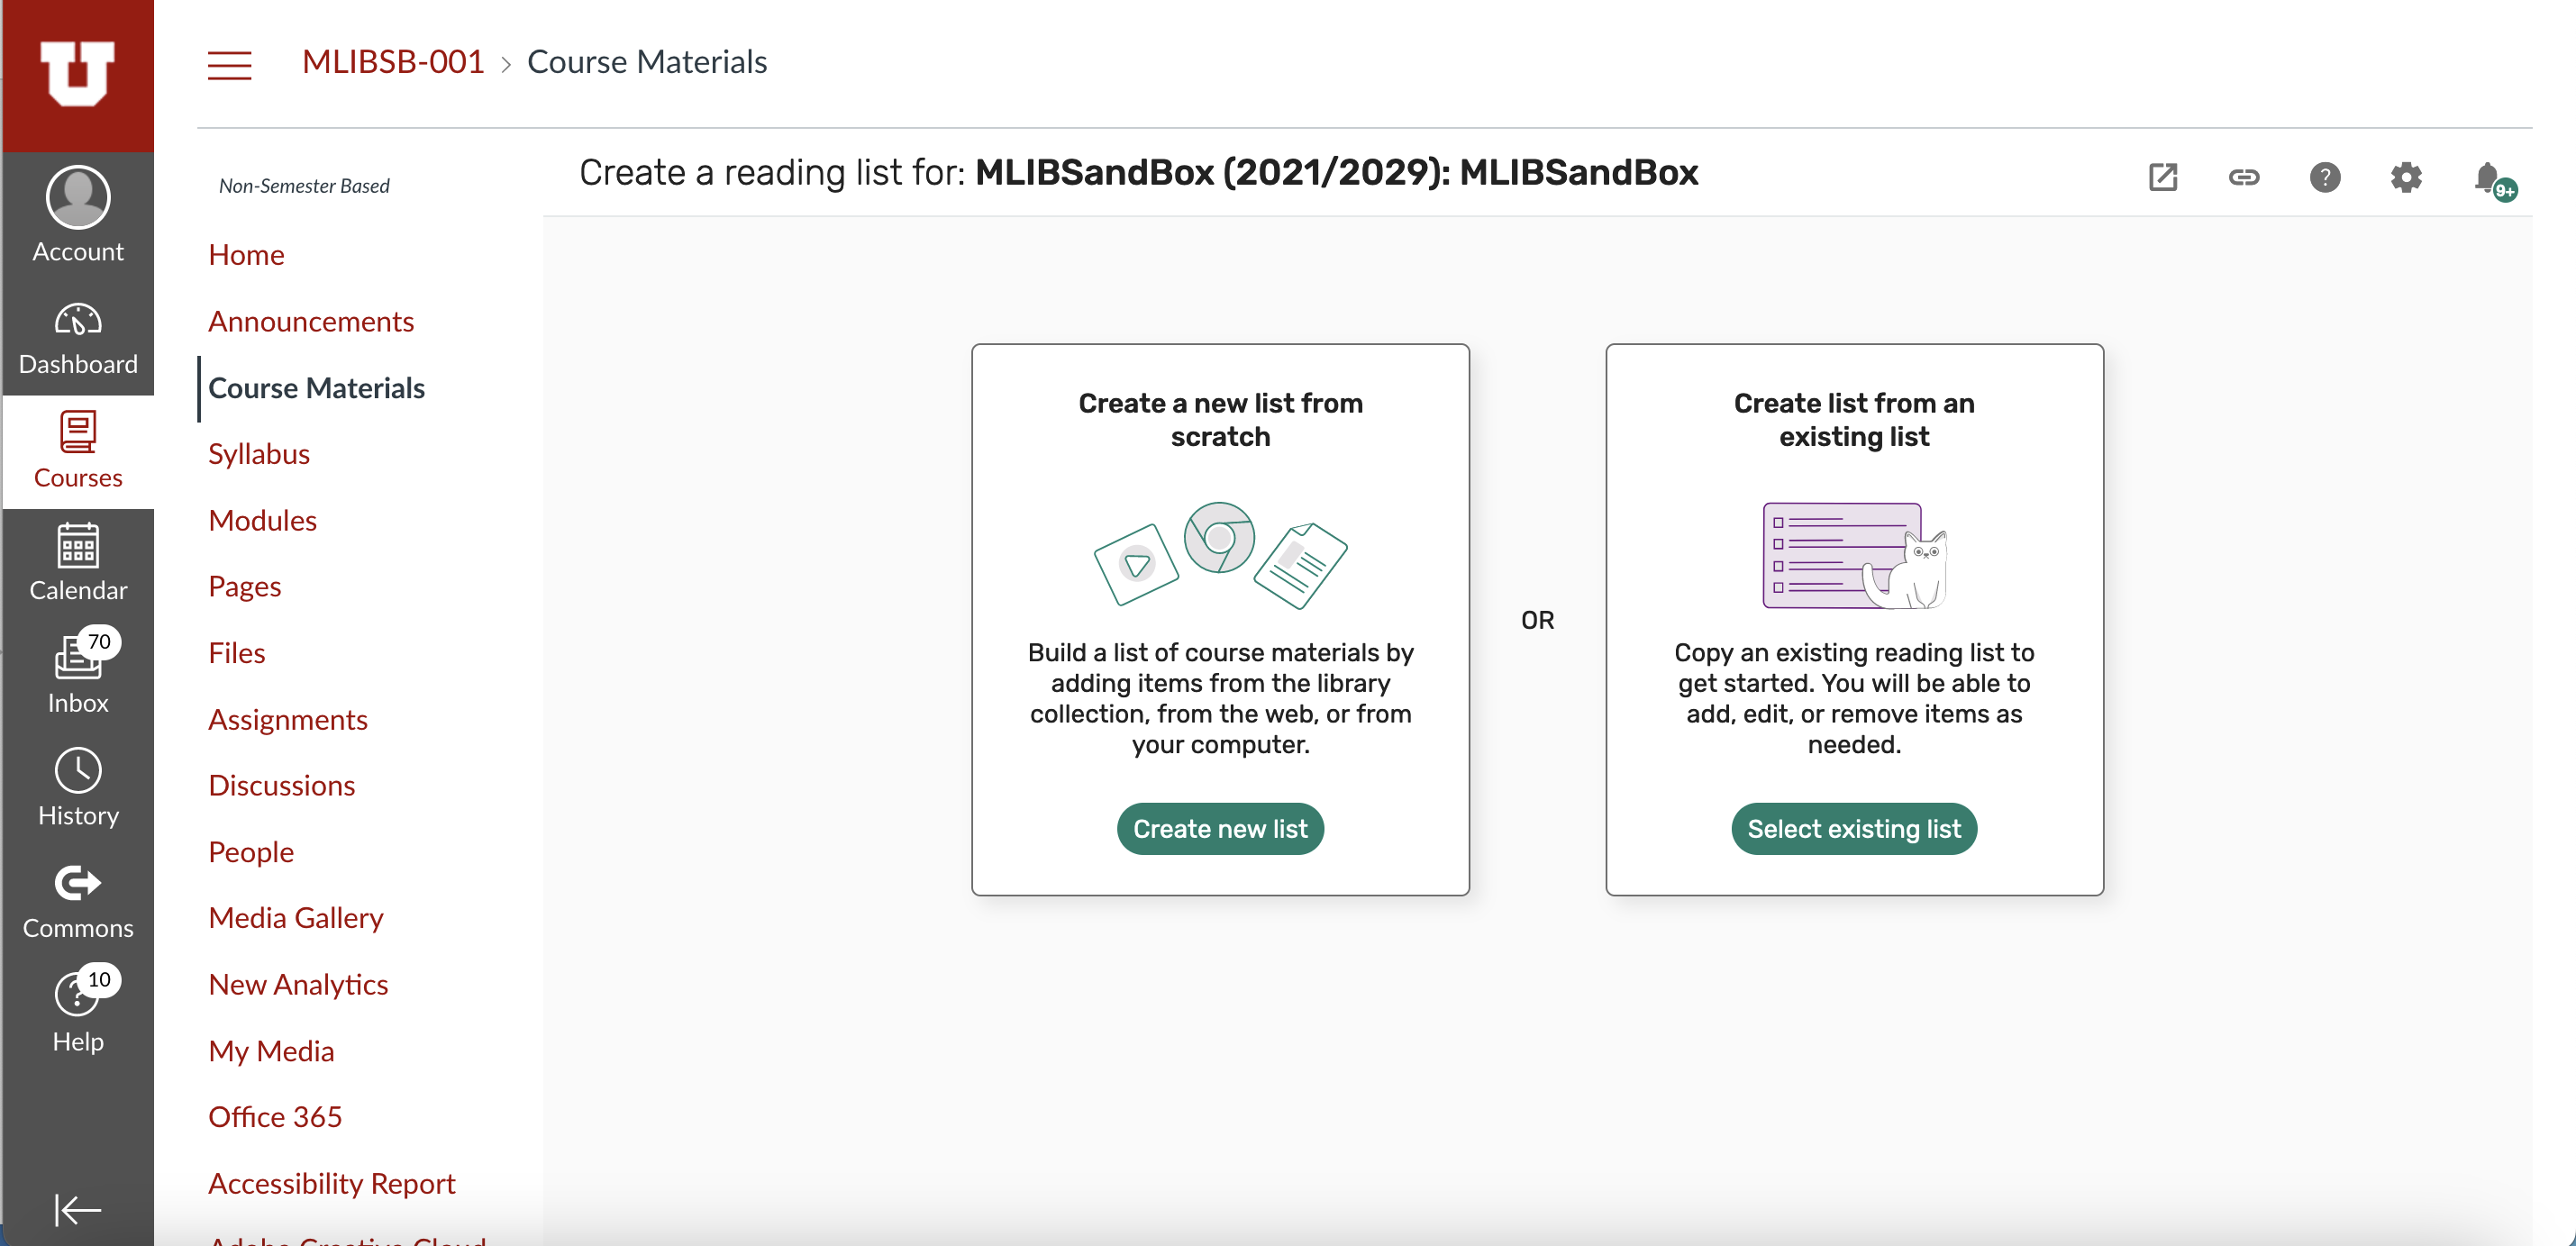
Accessing Course Materials and Managing Reading Lists
- Click the Course Materials link – In the Canvas menu, select the now-enabled Course Materials link to open the welcome screen.
- Choose how to proceed:
- If you have an existing reading list – Click Select 'existing list' and follow the steps in the 'Use an Existing Reading List' in a New Course section.
- If you do not have an existing reading list – Click 'Create a new list to start from scratch'.
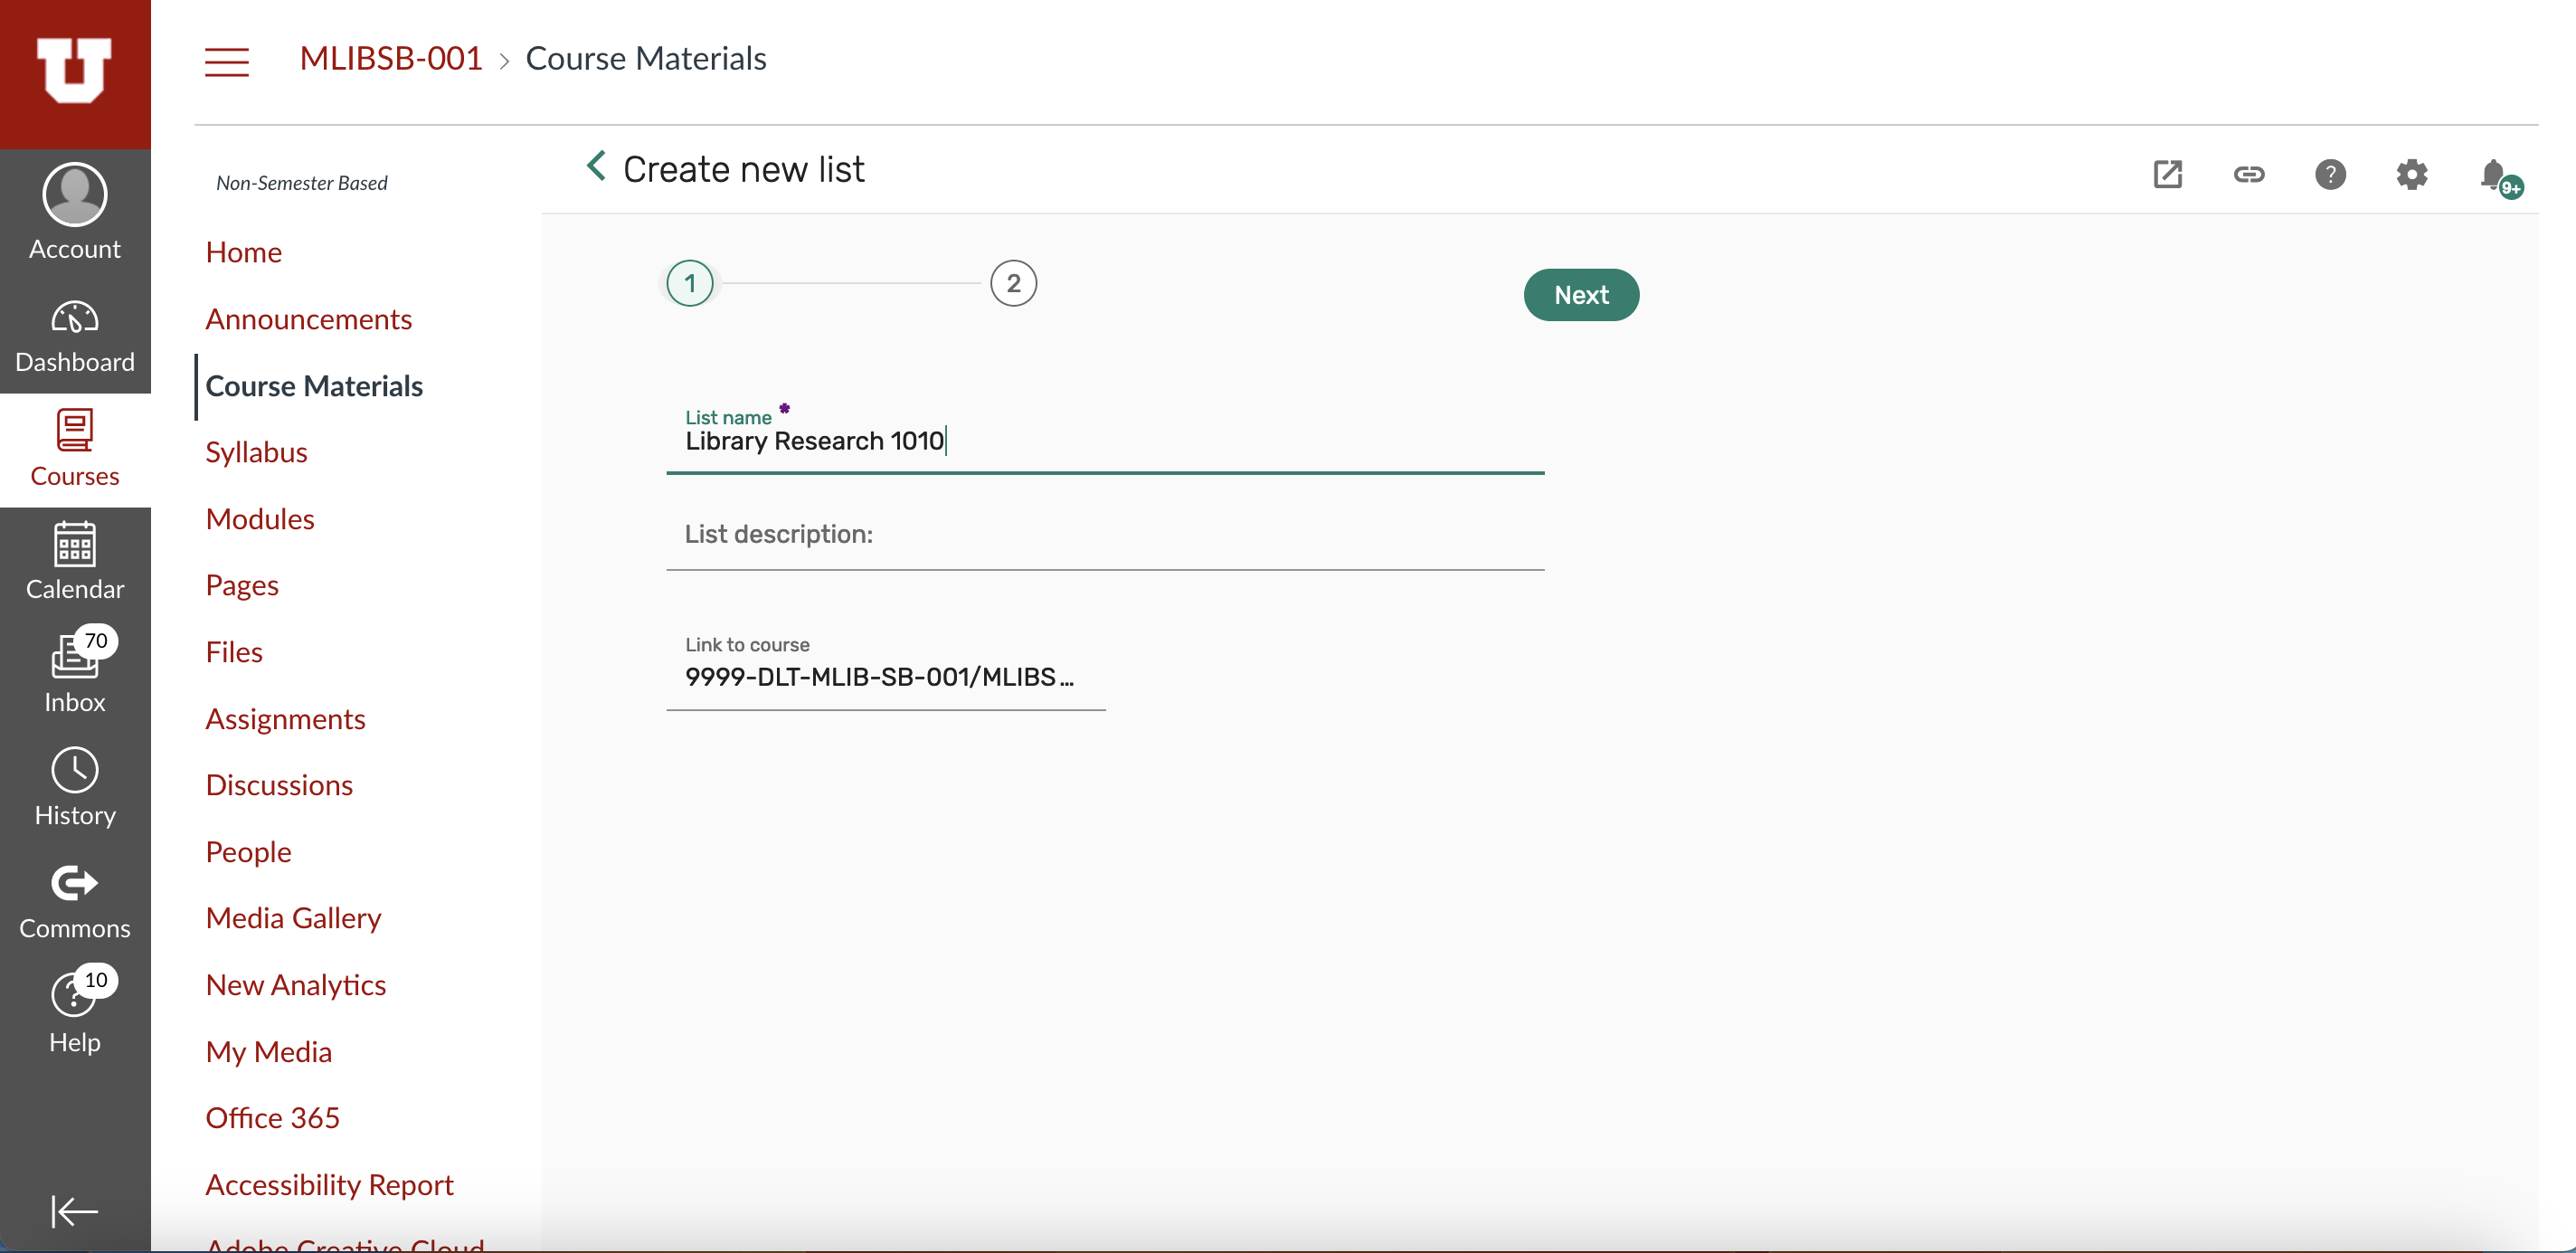
Creating Your Reading List
- Confirm or Change the 'List Name' – Review the suggested name for your reading list or enter a new one.
- Click 'Next' – Proceed to the next step.
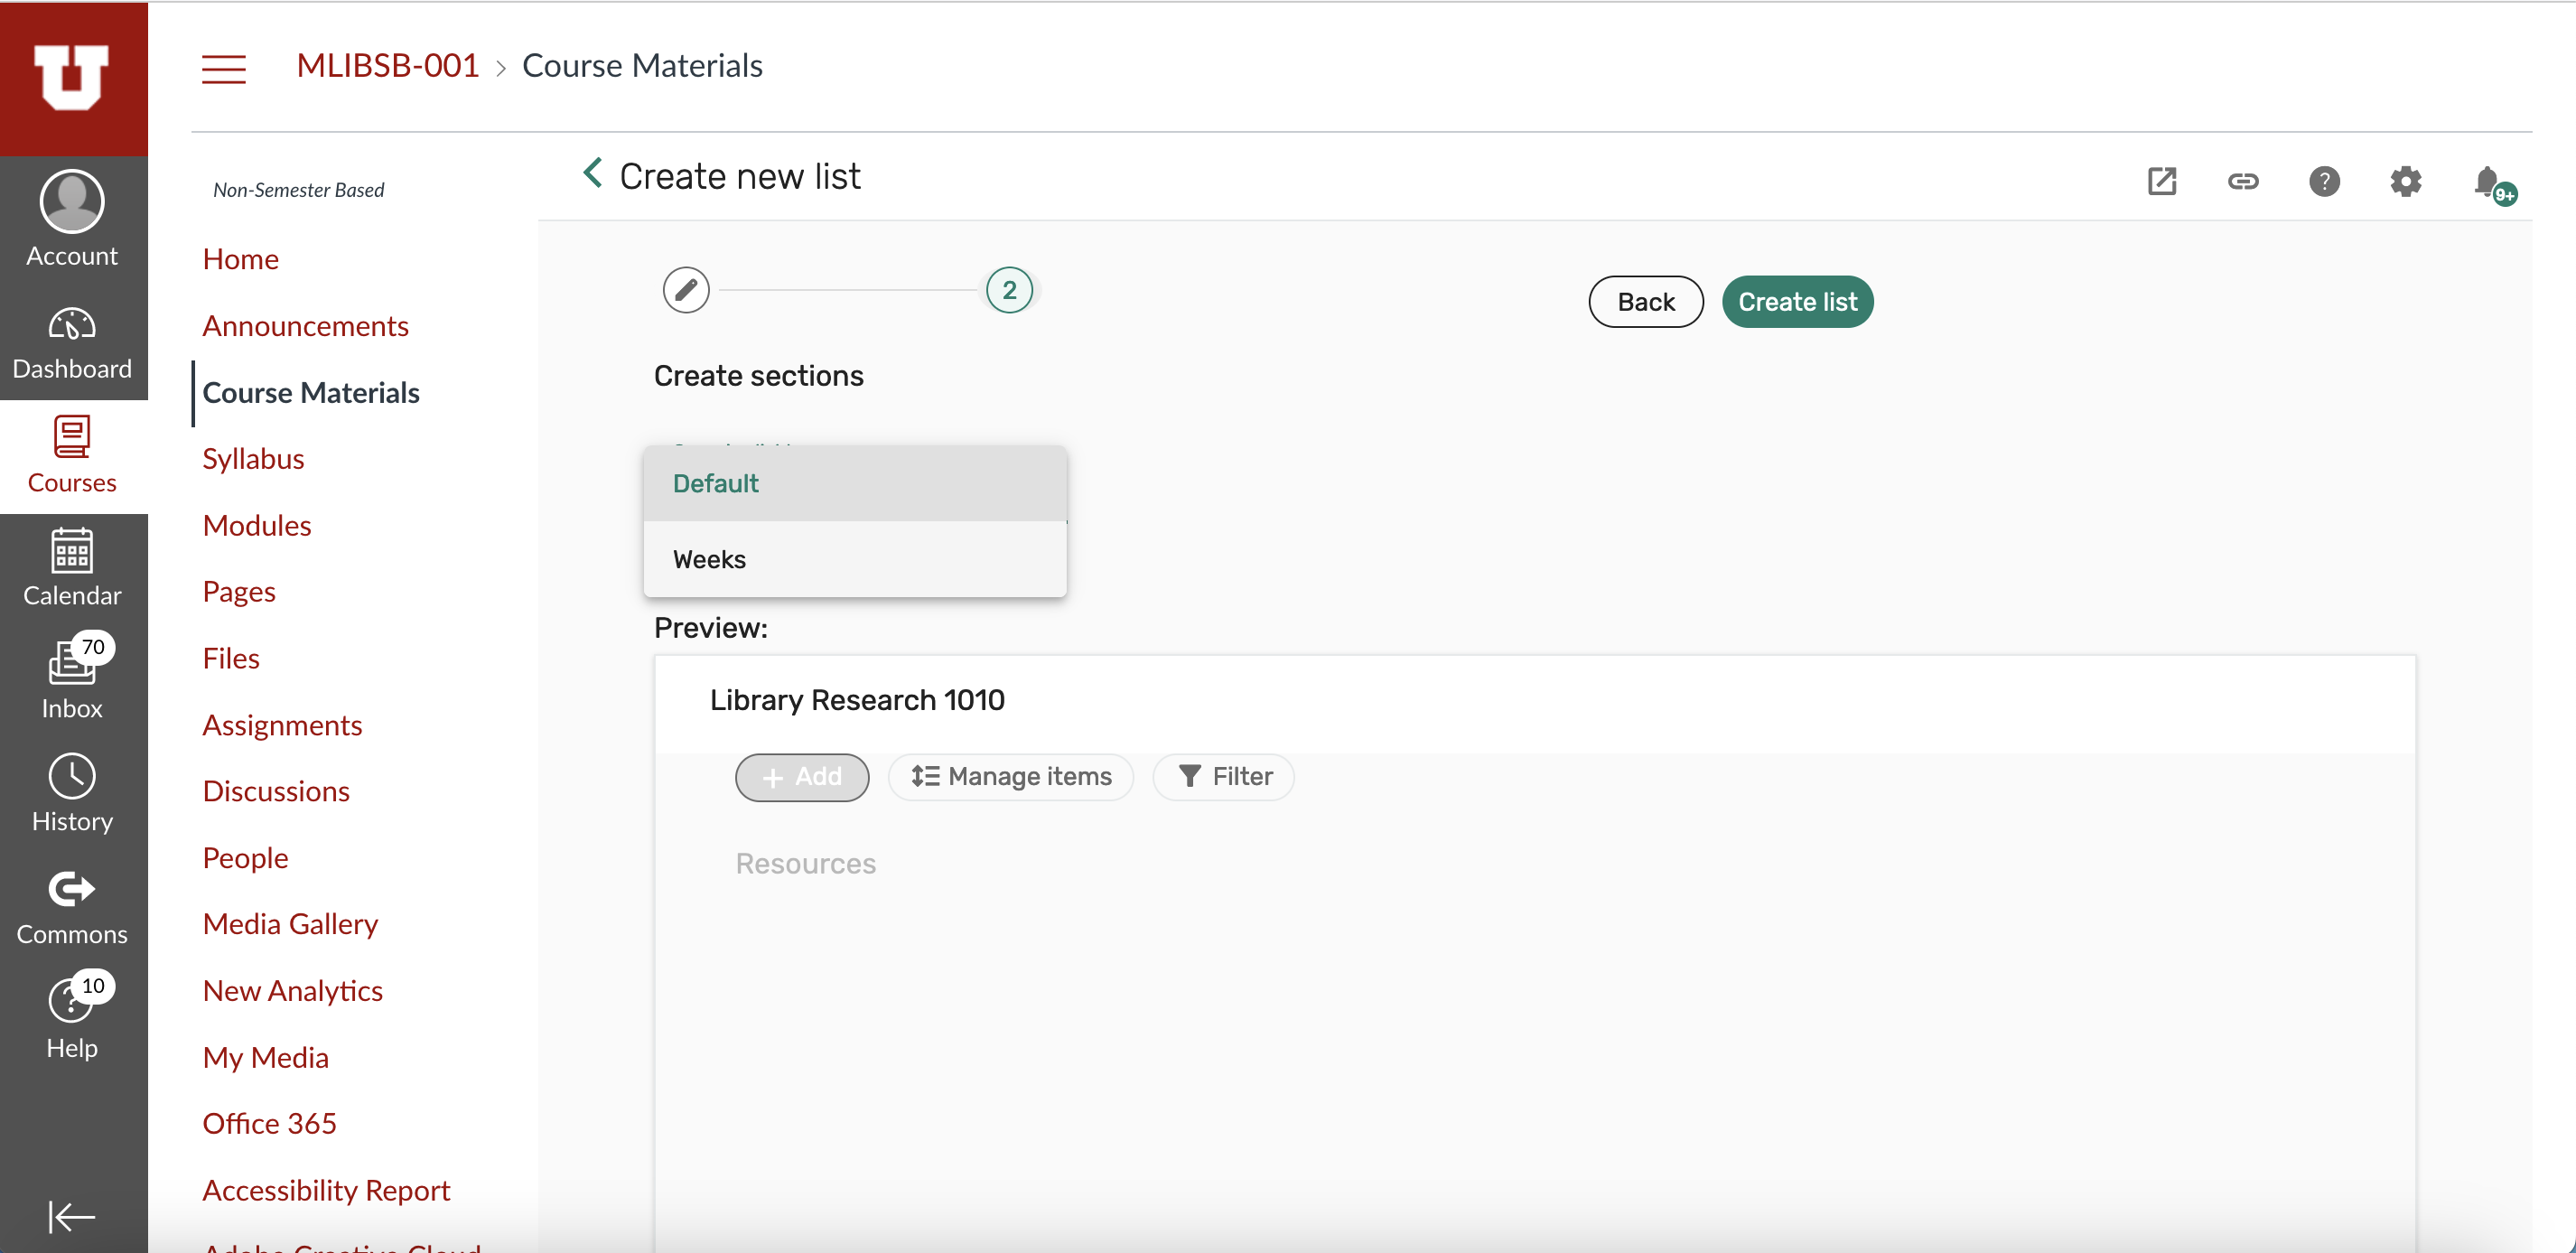
- Specify the Number of Sections – Enter the 'number of sections' you want to include in your reading list.
- You may choose to have a default list with one section, or you may enter a number of weeks to specify the number of sections in your reading list.
- Section names may be changed later.
Click 'Create list' to begin adding materials to your reading list
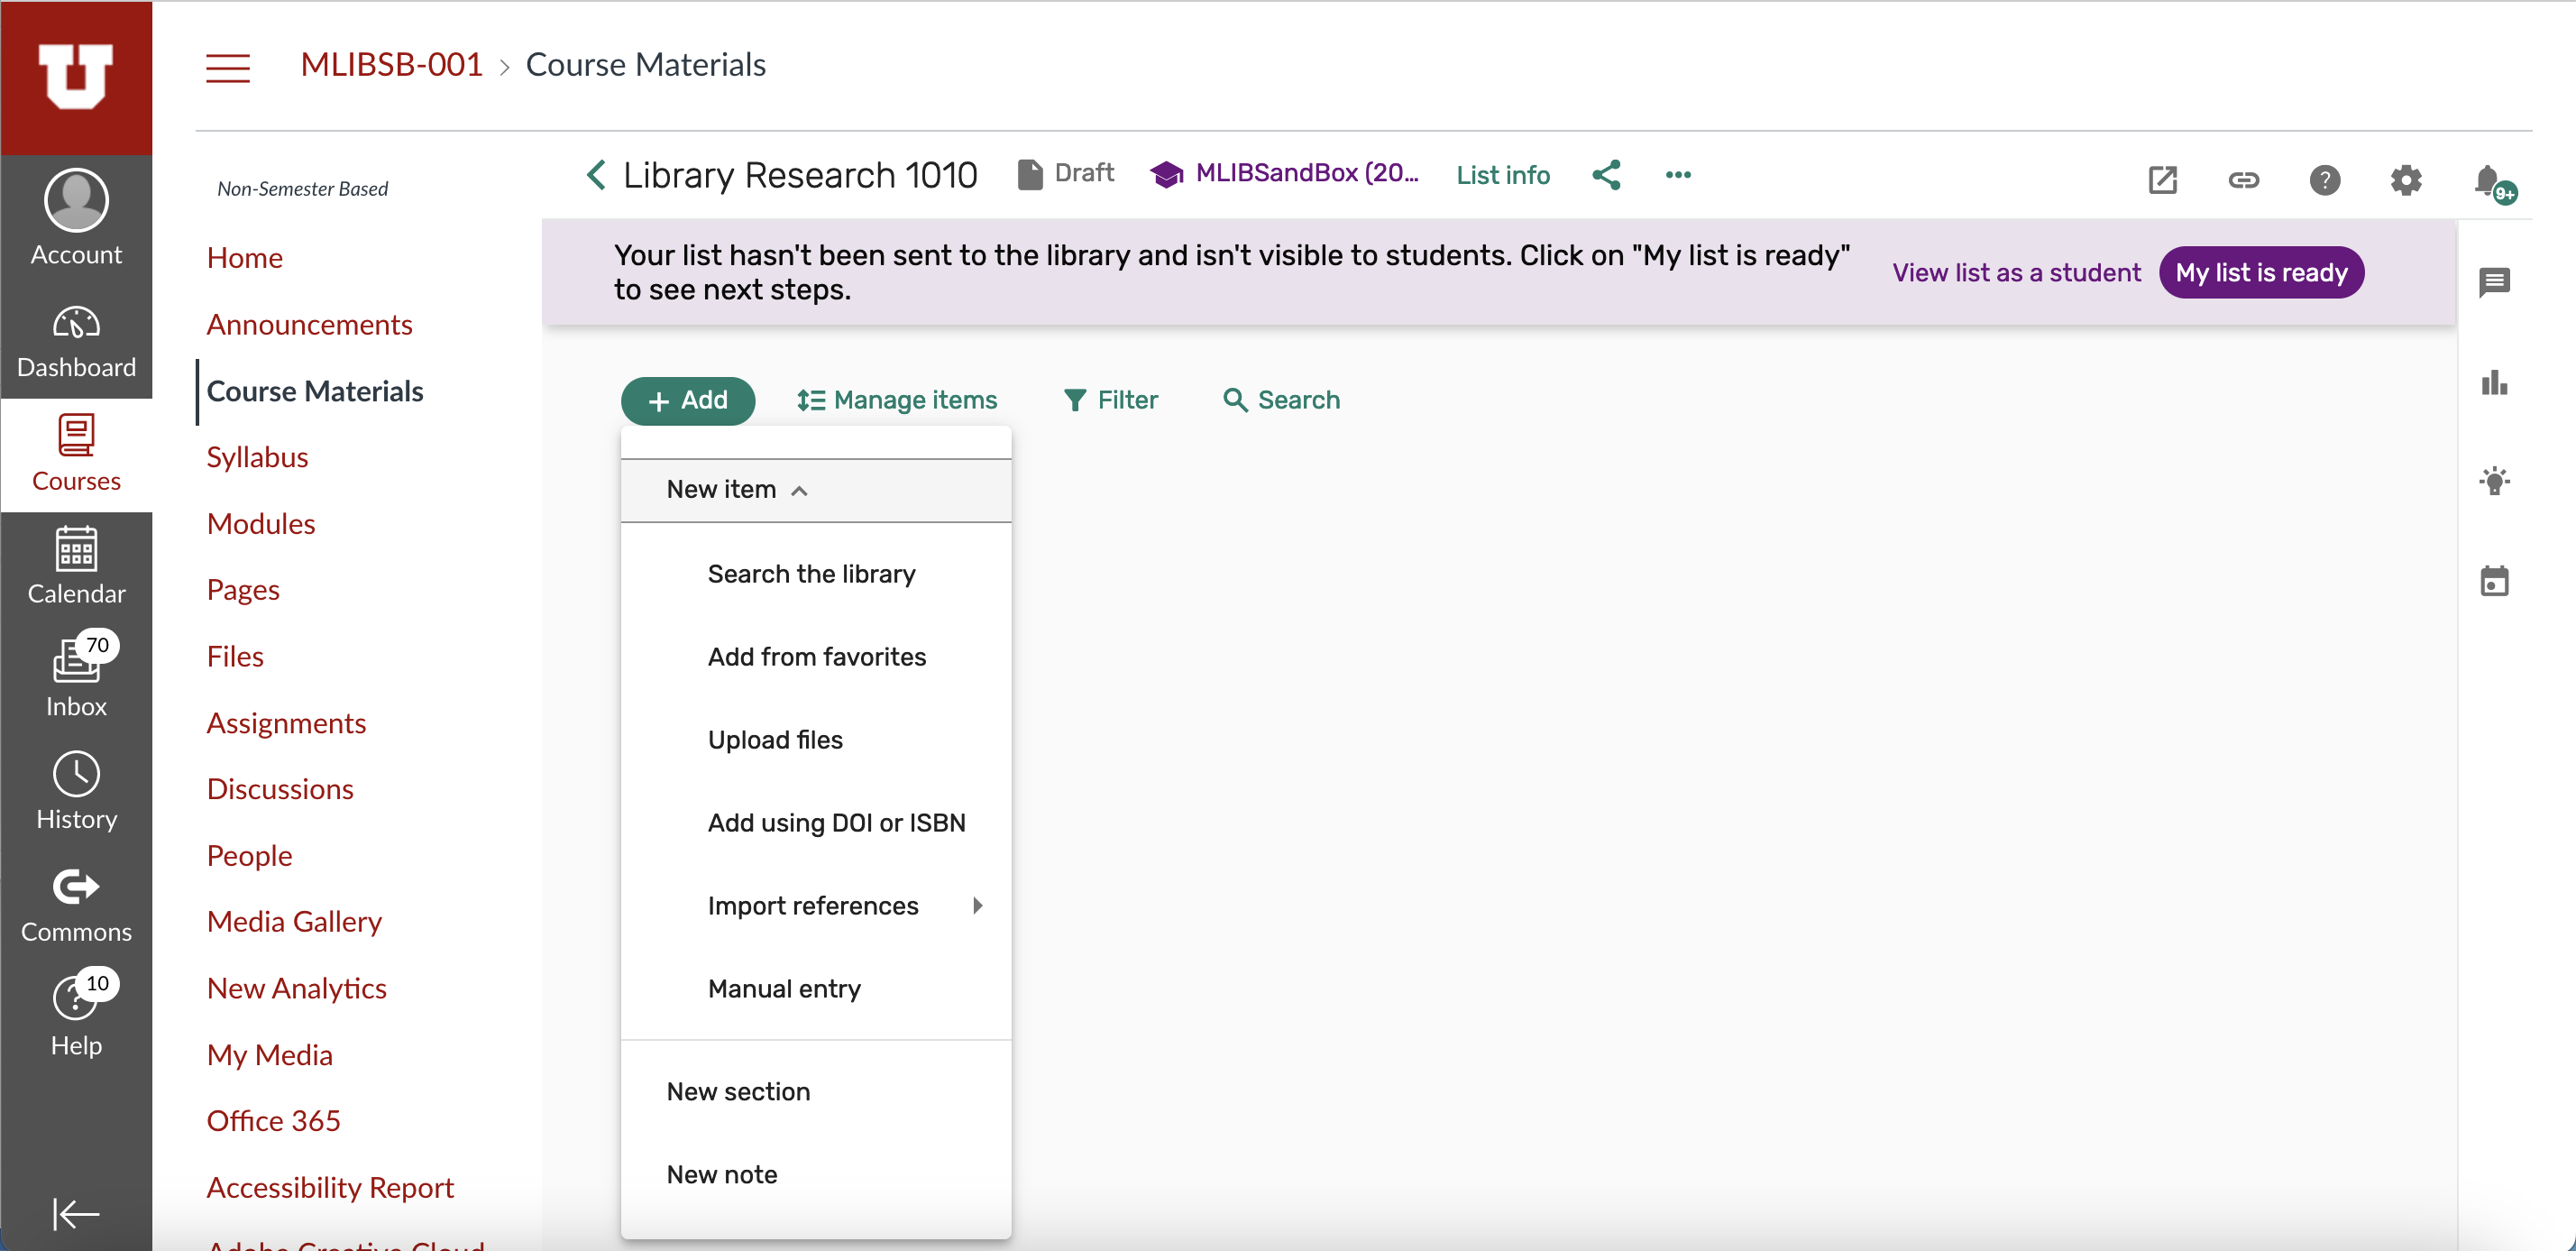
5. Select ‘Add Items’ to search for works in the University already owns or upload files from your computer
- Add owned electronic material
- Add owned physical material
- Request digitization of owned physical material
- Add a file from your computer
This video also shows you how to add items.
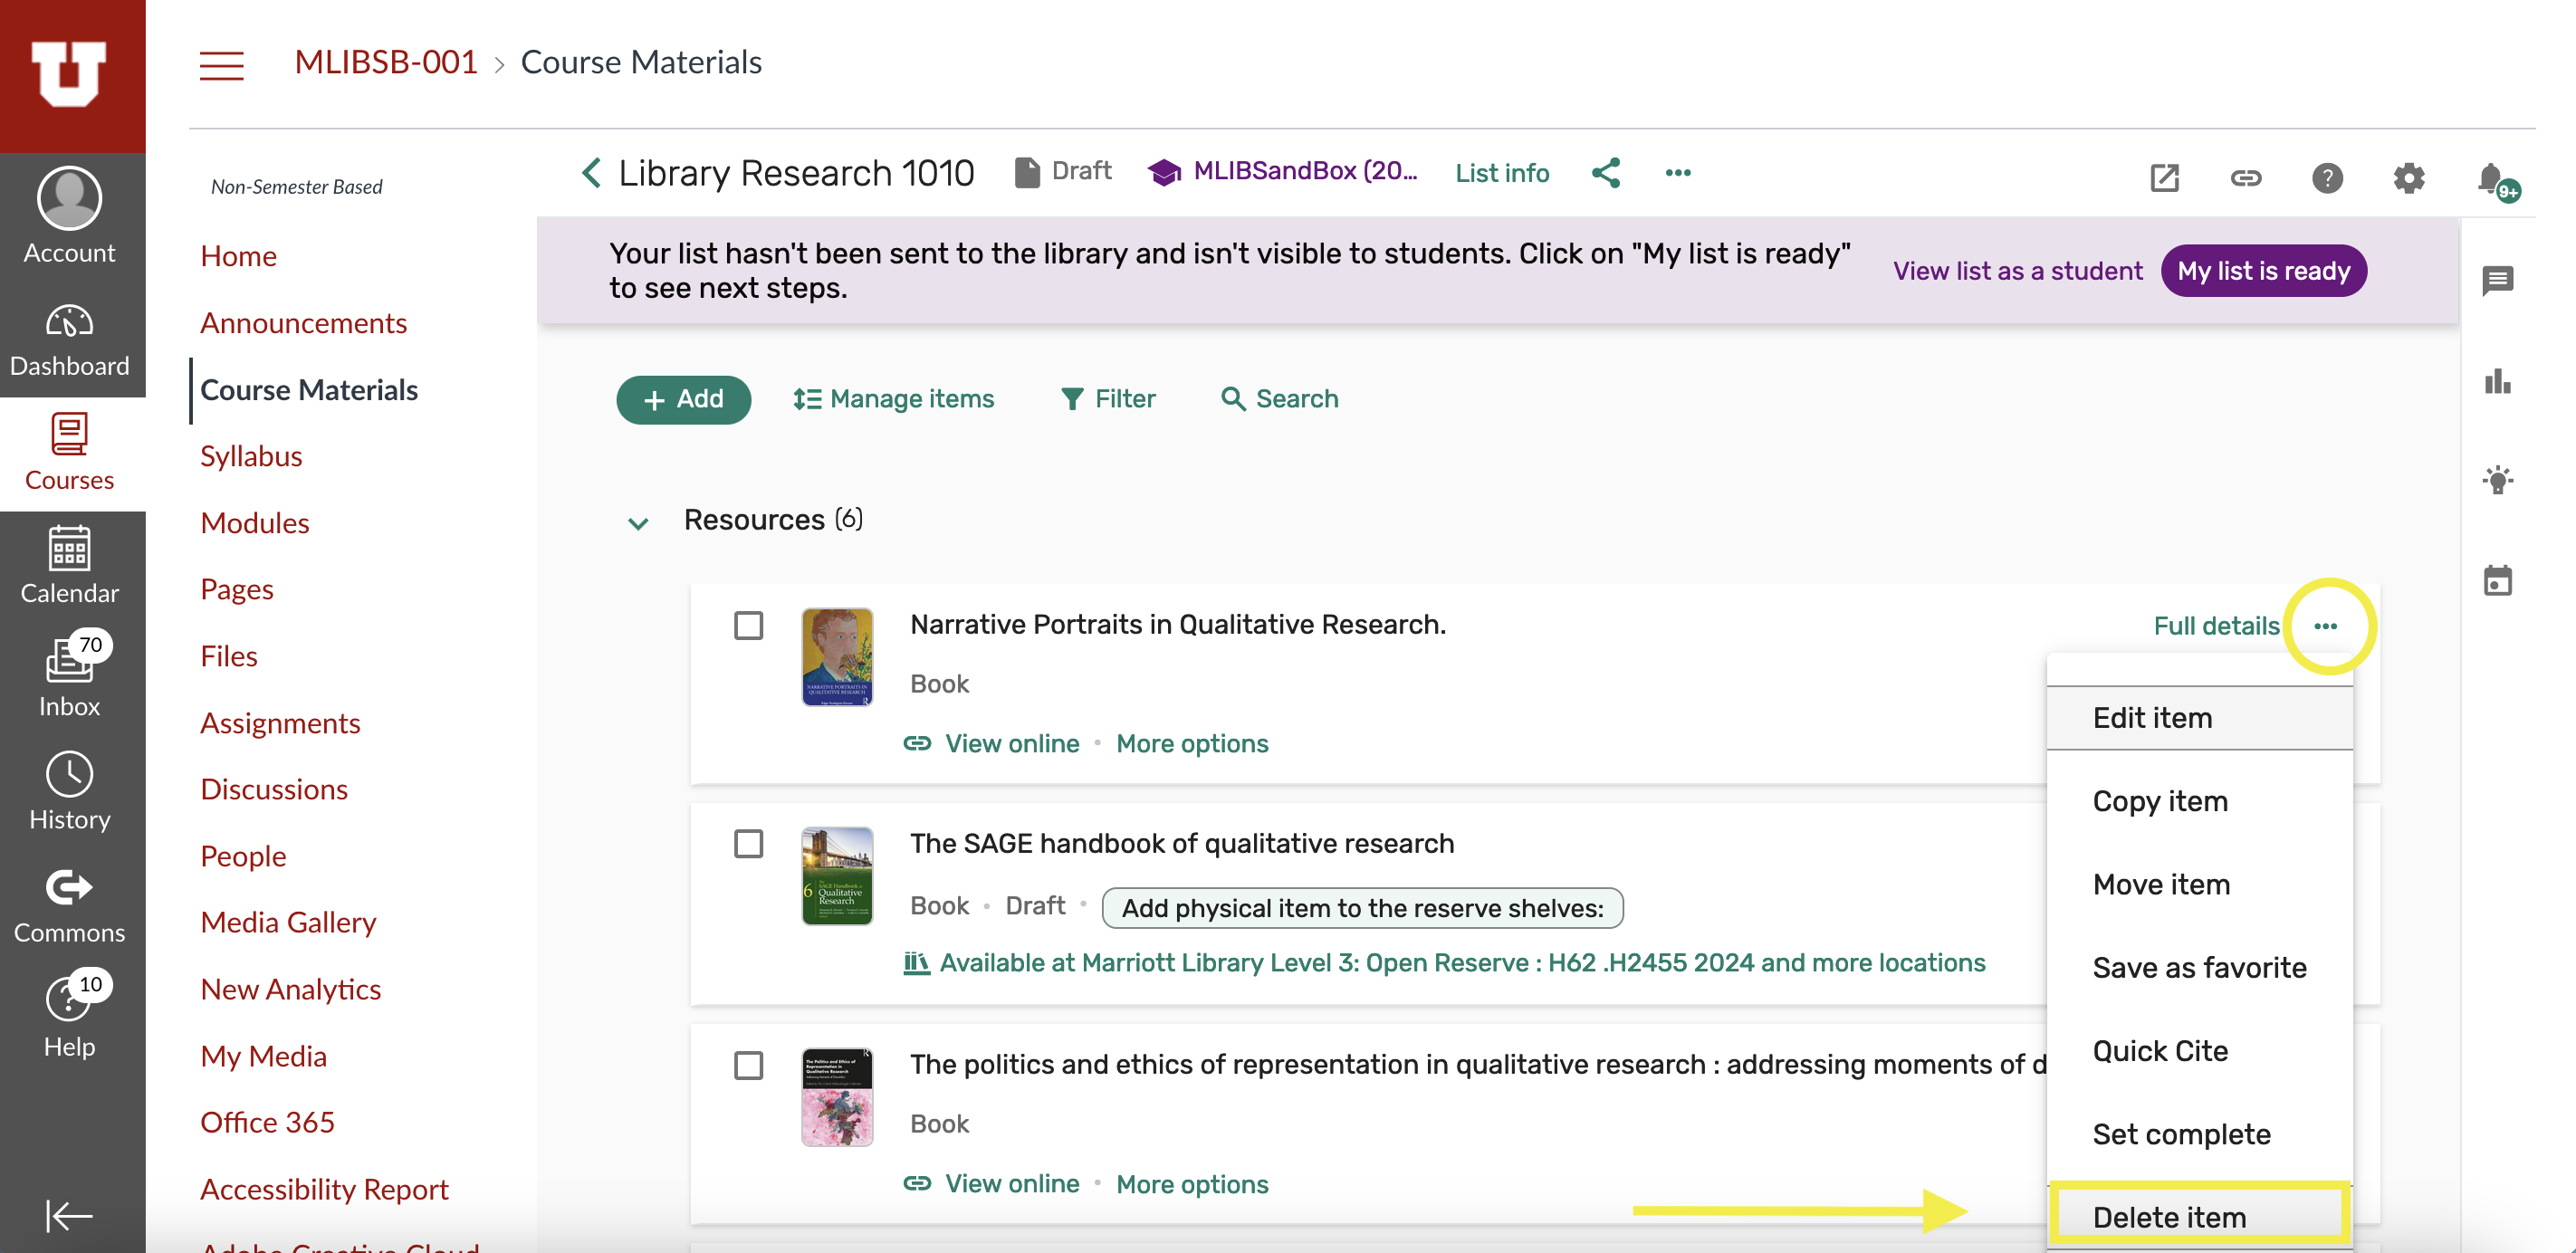
6. Select ‘Delete Item’ to remove a work from the reading list
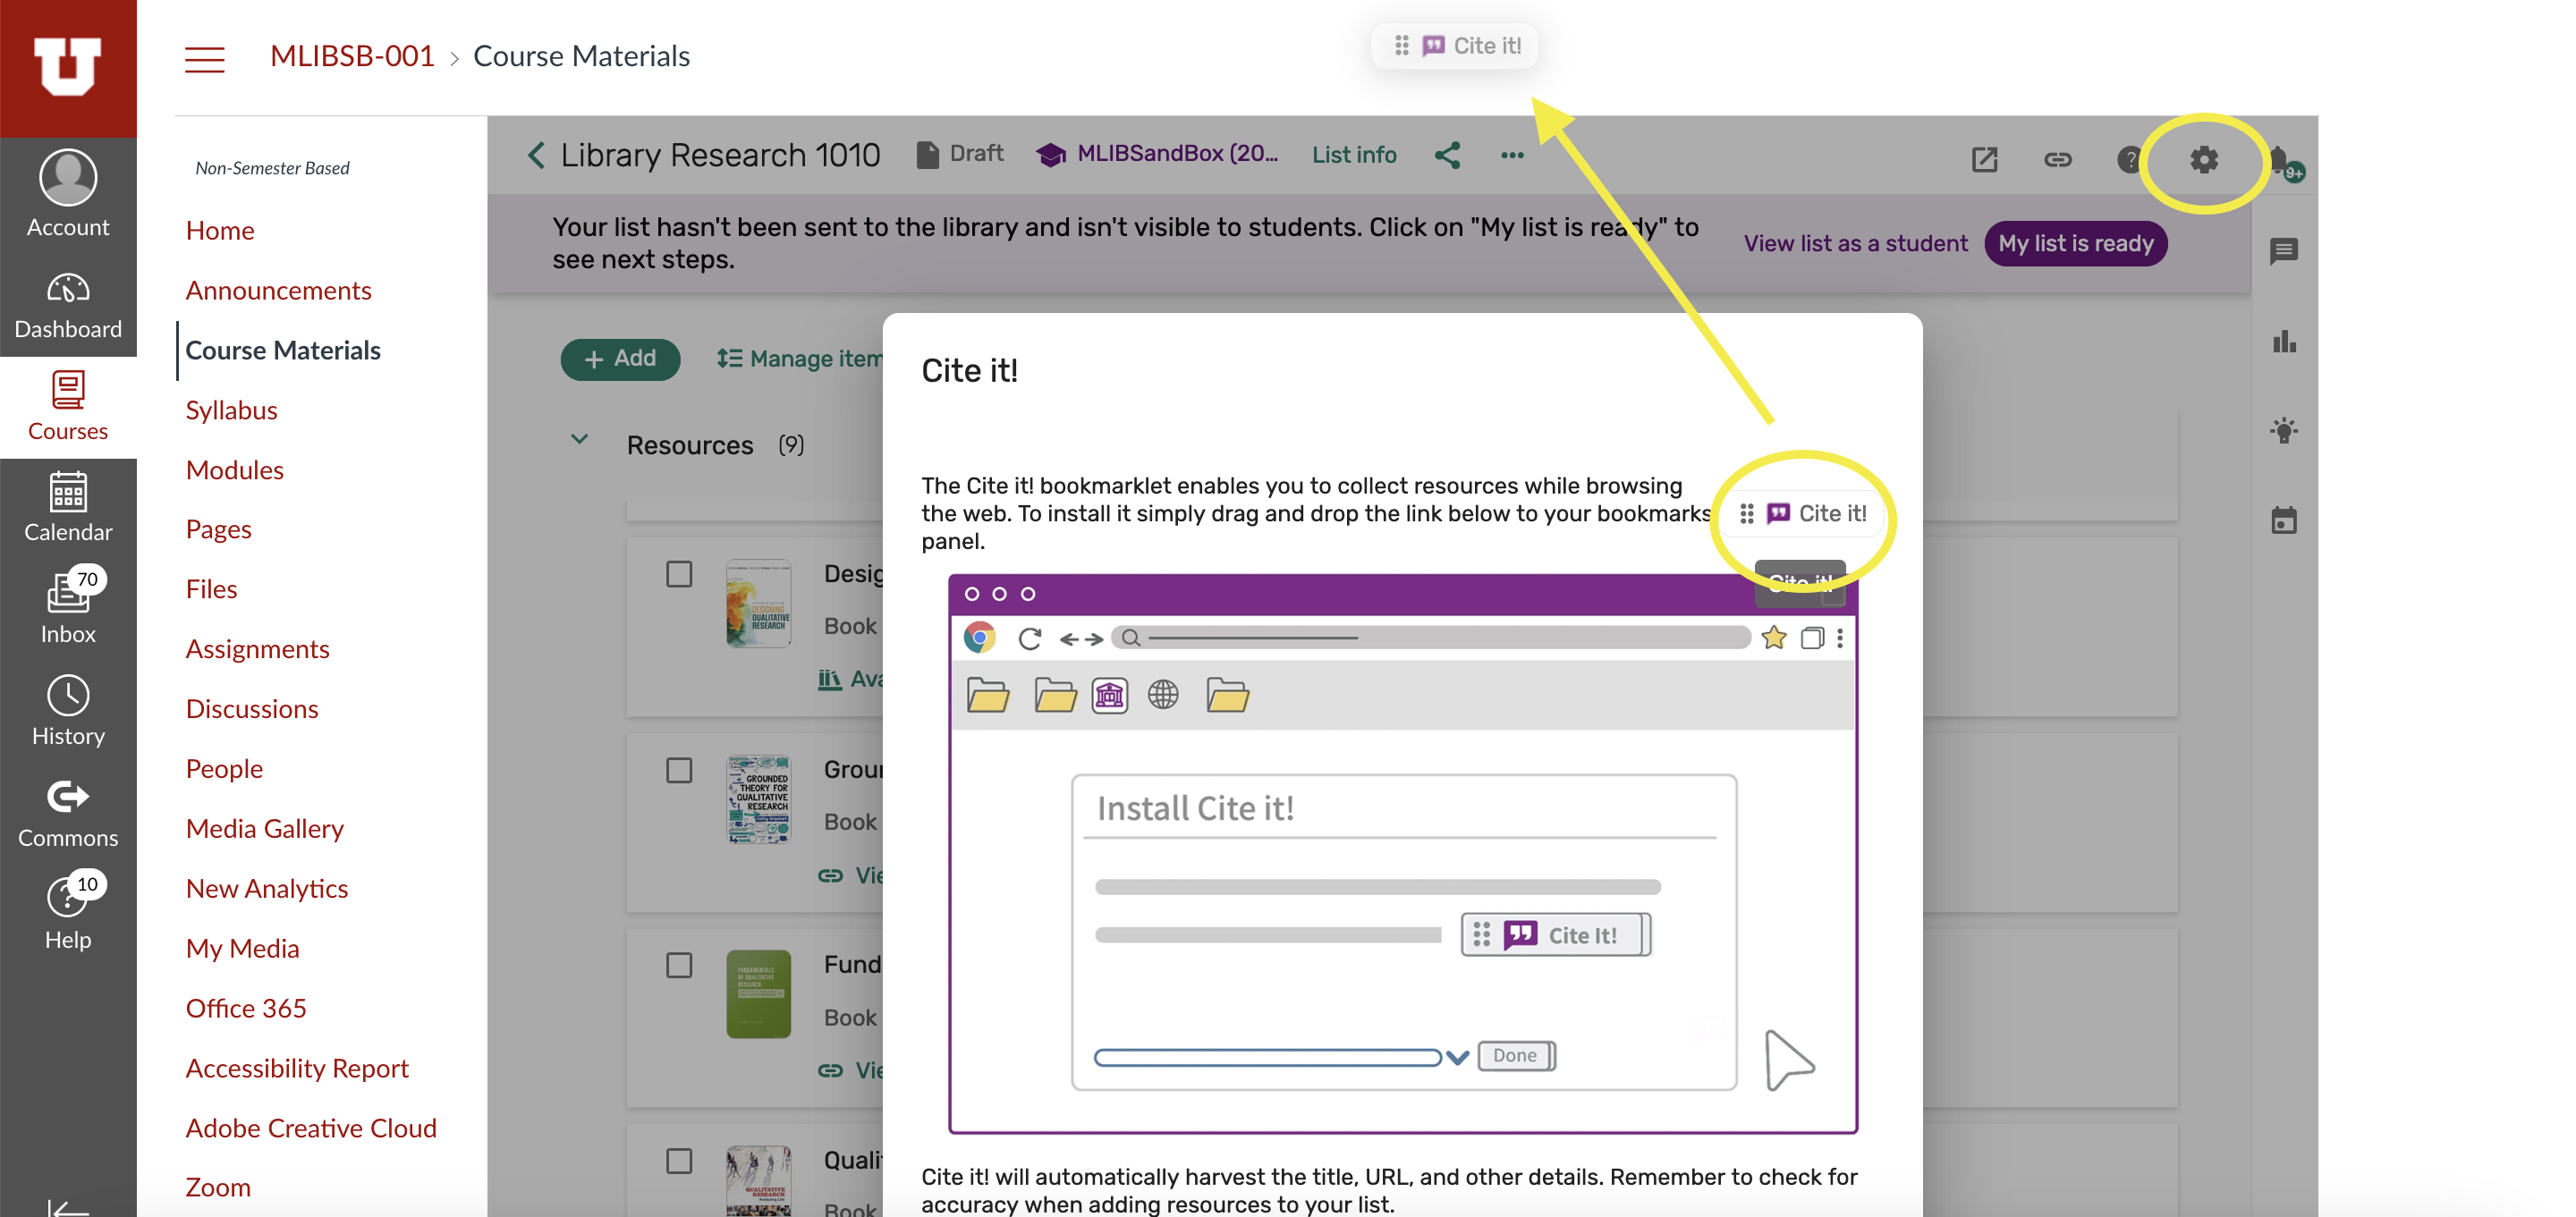
7. Add the Cite It bookmarklet to include items from the web. You must be logged in for the Cite It tool to work.
- Click the Settings icon in the top right corner of the window and select 'Cite It!'
- Now to install, simply drag and drop the 'CITE IT!' link to your browser's toolbar. That's it. You are ready to start adding web citations.
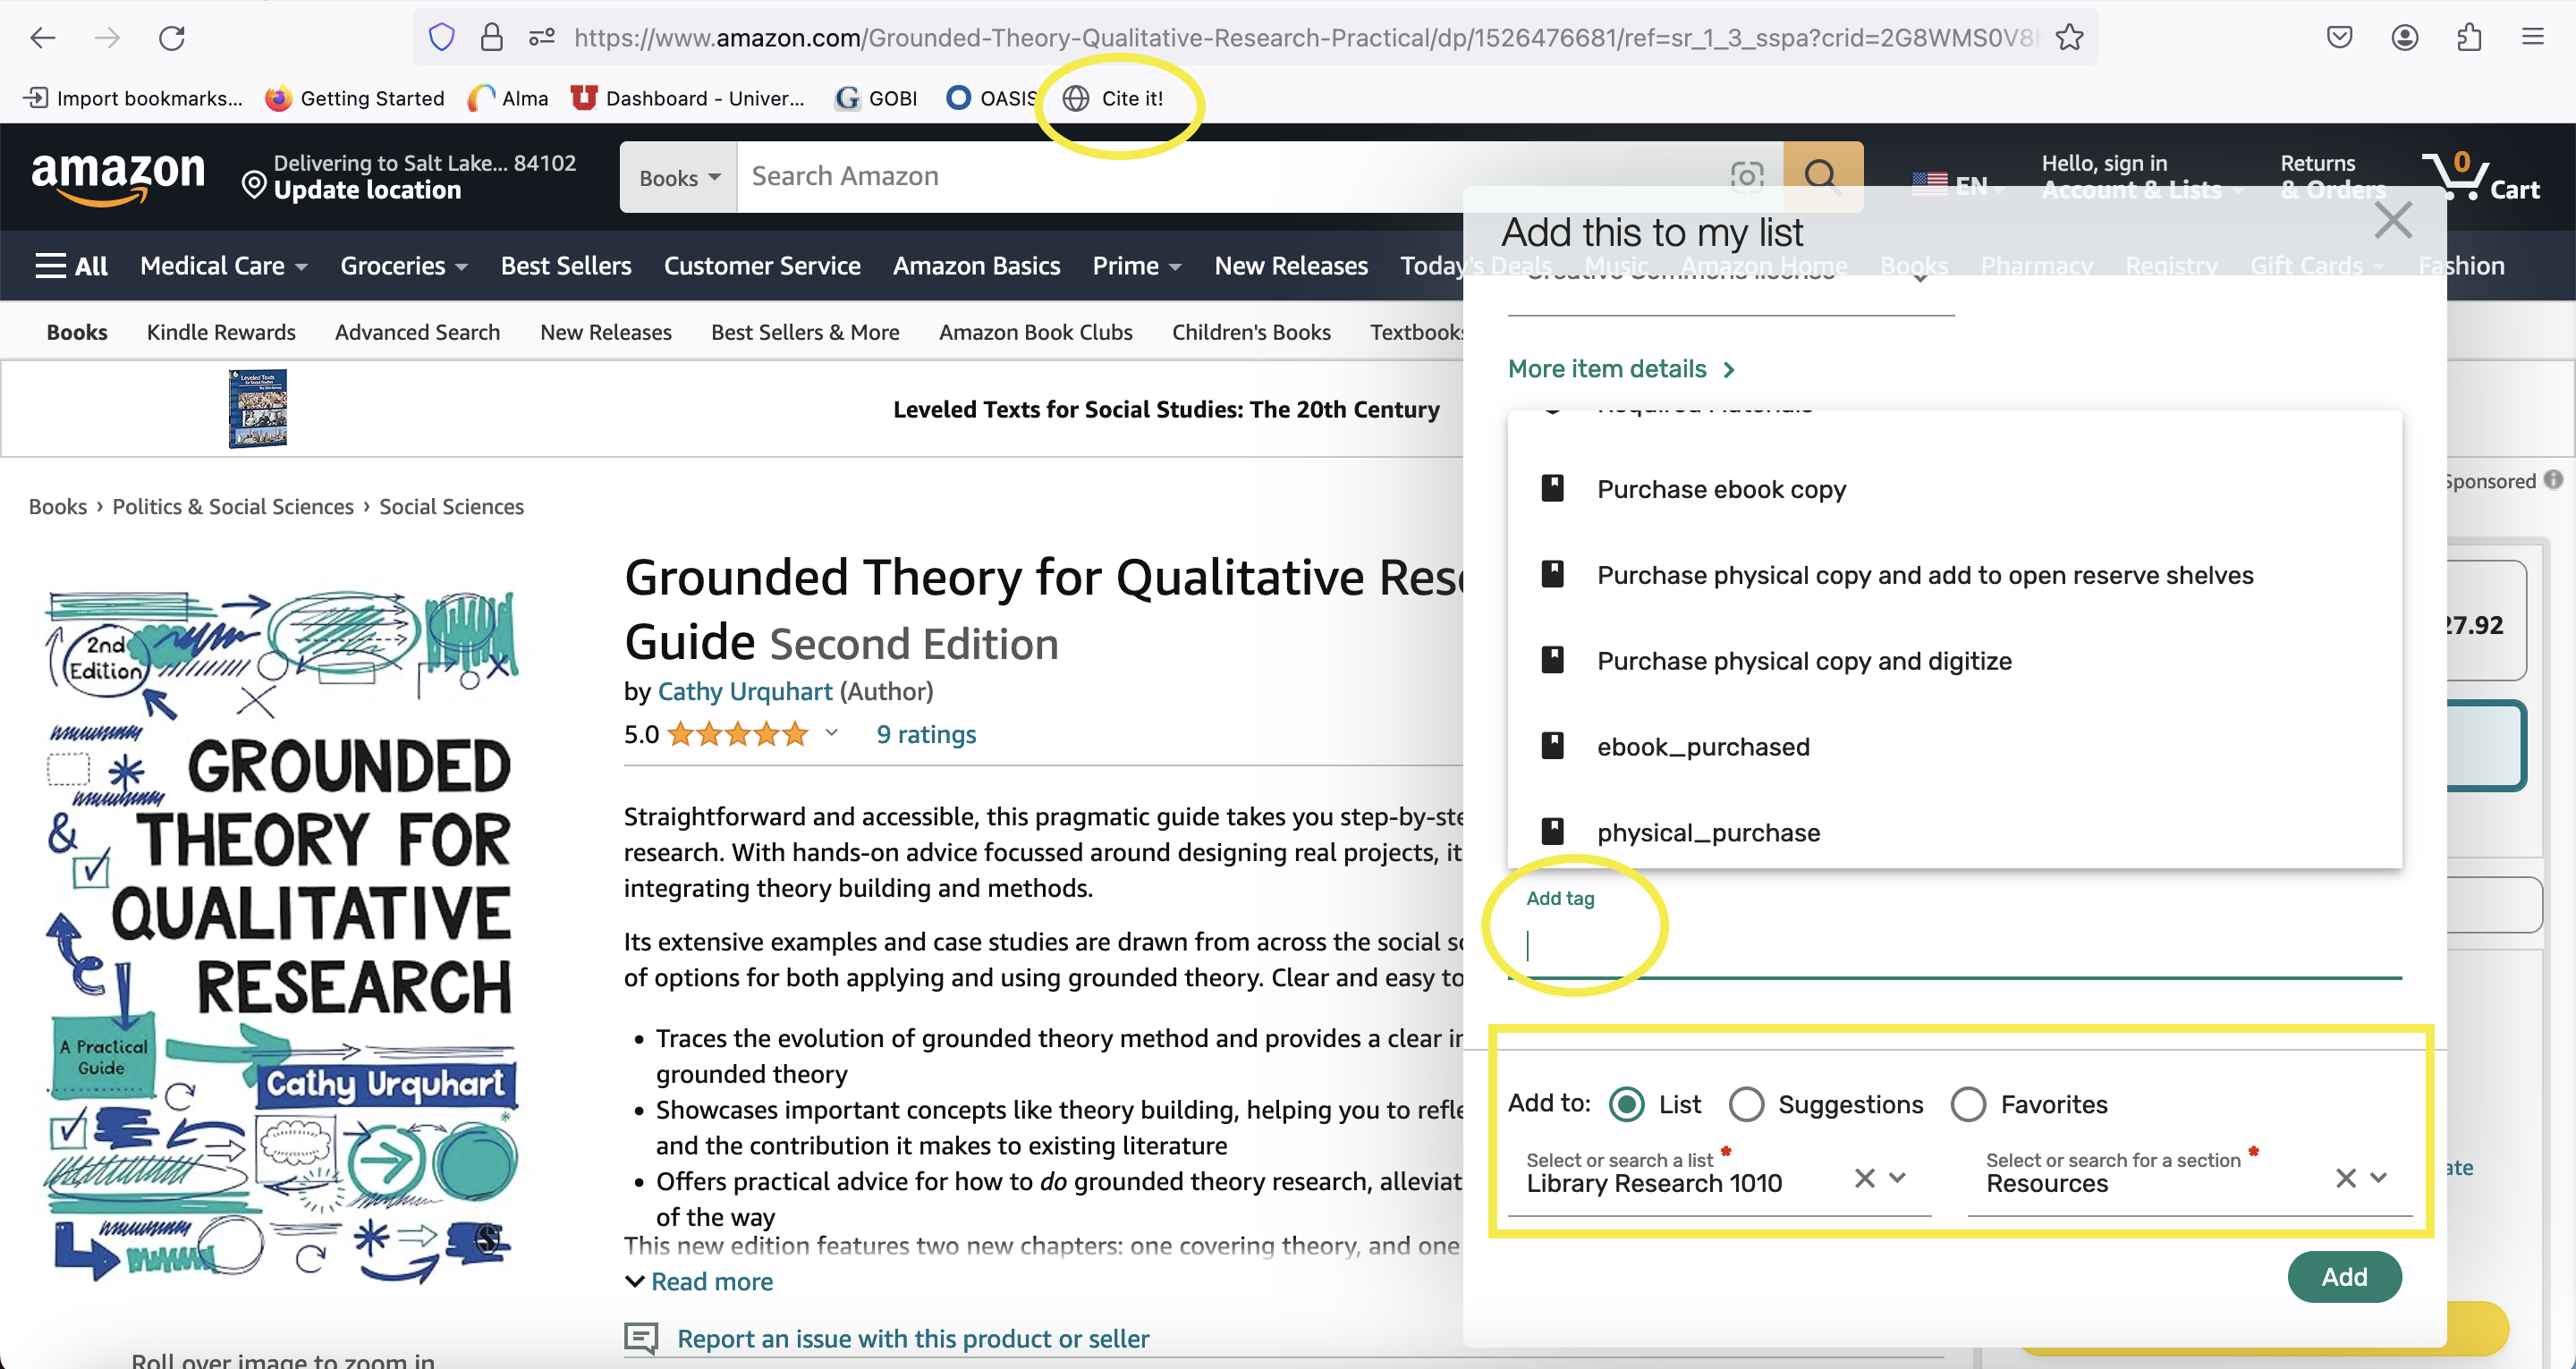
8. To suggest a purchase or make a digitization request:
- From the webpage showing the item you want the library to buy or digitize,
- Click the Cite It bookmarklet in your browser toolbar
- Look at the pop-up window
- Scroll to the bottom of the pop-up window to ‘Add Tag’ to tag the citation for purchase/digitization
- Choose the List the work should be added to and the week or reading list section
- Select ‘Add and Close’
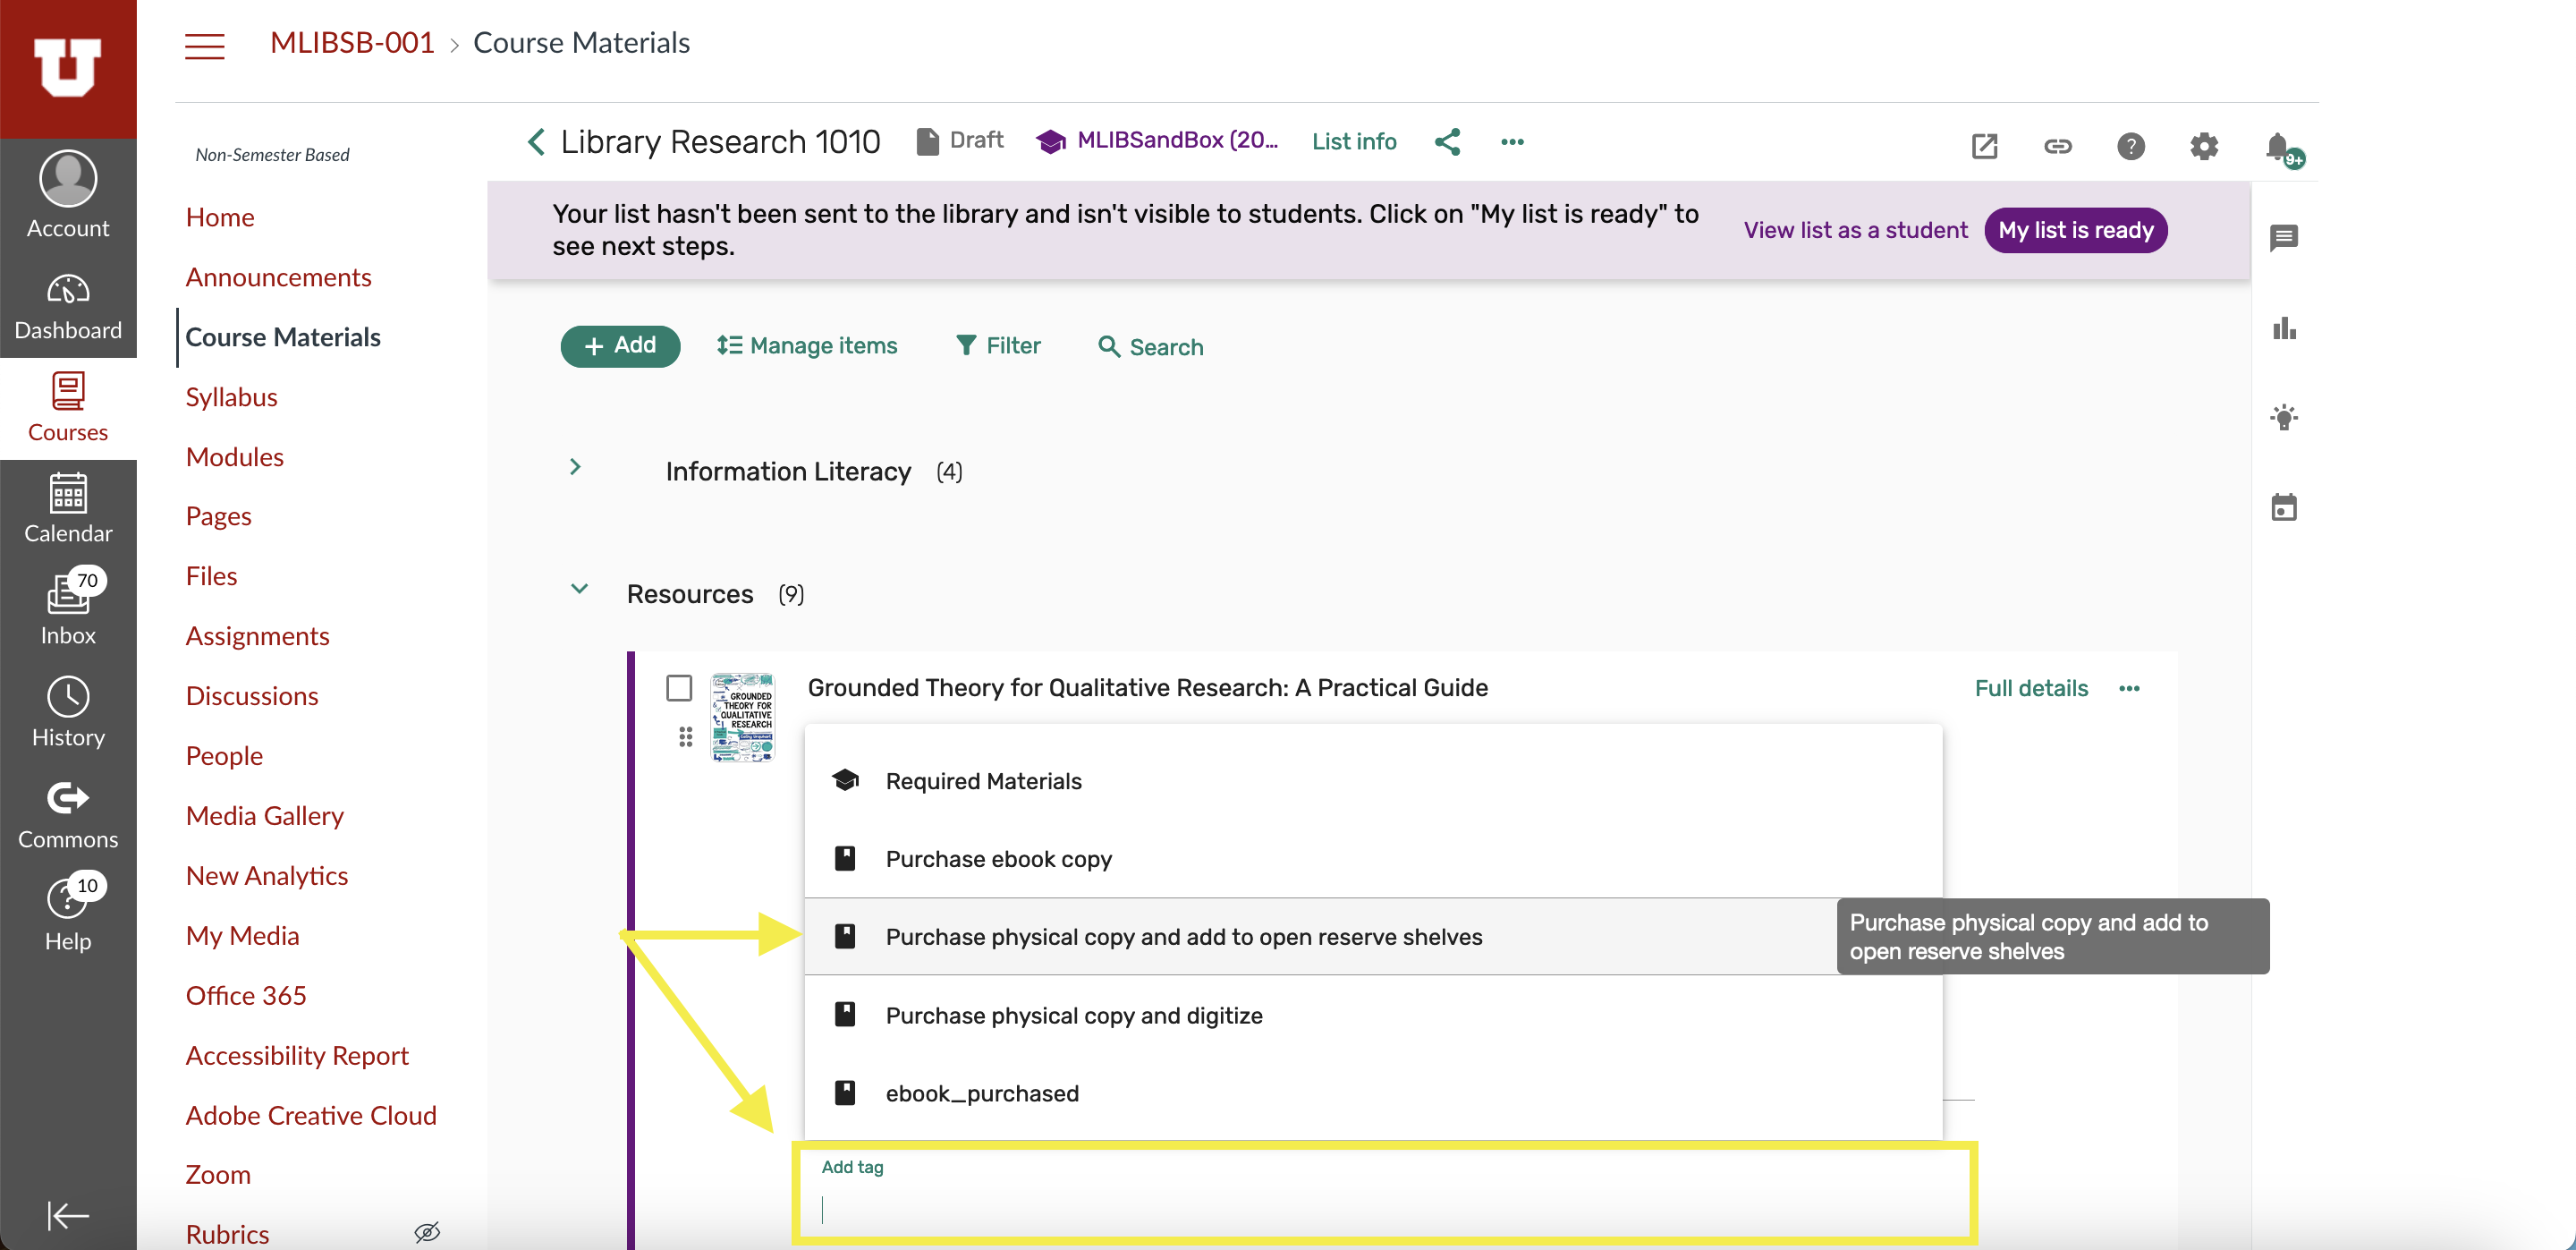
- If you need to add a tag later, you can do so from your Course Materials page in Canvas; go to the week or section and click on the citation to expand the citation view and open the tag options to tag it for purchase/digitization
- Look for ‘Add Tag’
- Choose the tag you prefer from the menu
This video will also show you how to add an item with Cite It and request a purchase.
9. Publish your list to students by clicking “My list is ready”:
- This will also send your list to the library to be reviewed.
- Any additional citations added to the reading list after clicking this button will automatically be sent to the library for review so that staff can evaluate items requested for purchase and verify the functionality of web links.
10. Once your Course Materials are complete, you can add specific resources directly to Canvas Modules.
- Choose 'Modules' from the instructor navigation menu
- Navigate to the module you want to incorporate content from your Course Materials
- Click the 'plus' sign on the top right corner of the module
- Select 'External Tool' from the drop down
- From the options below, scroll to 'Course Materials Link Selection' to load your materials
- Select the specific item you want to add to the module and click 'Select' in the bottom right corner
- Back at the original menu, click 'Add Item'
This video will show you how to move through the steps to add a specific item to your module.
Contact your Course Librarian or the Reserve team with questions.
If you have already used Course Materials to create a reading list in the past, you can easily duplicate lists from semester to semester, adjusting as you need. You can also duplicate lists created by someone else.
If you have questions or need help getting started contact your Course Librarian.
Step by Step Overview
1. Ensure you’ve followed steps 1-3 in the 10-Step Overview to ensure you have linked your Canvas course to Course Materials.
2. Lists can be Duplicated to create a new version of the list from the welcome screen.
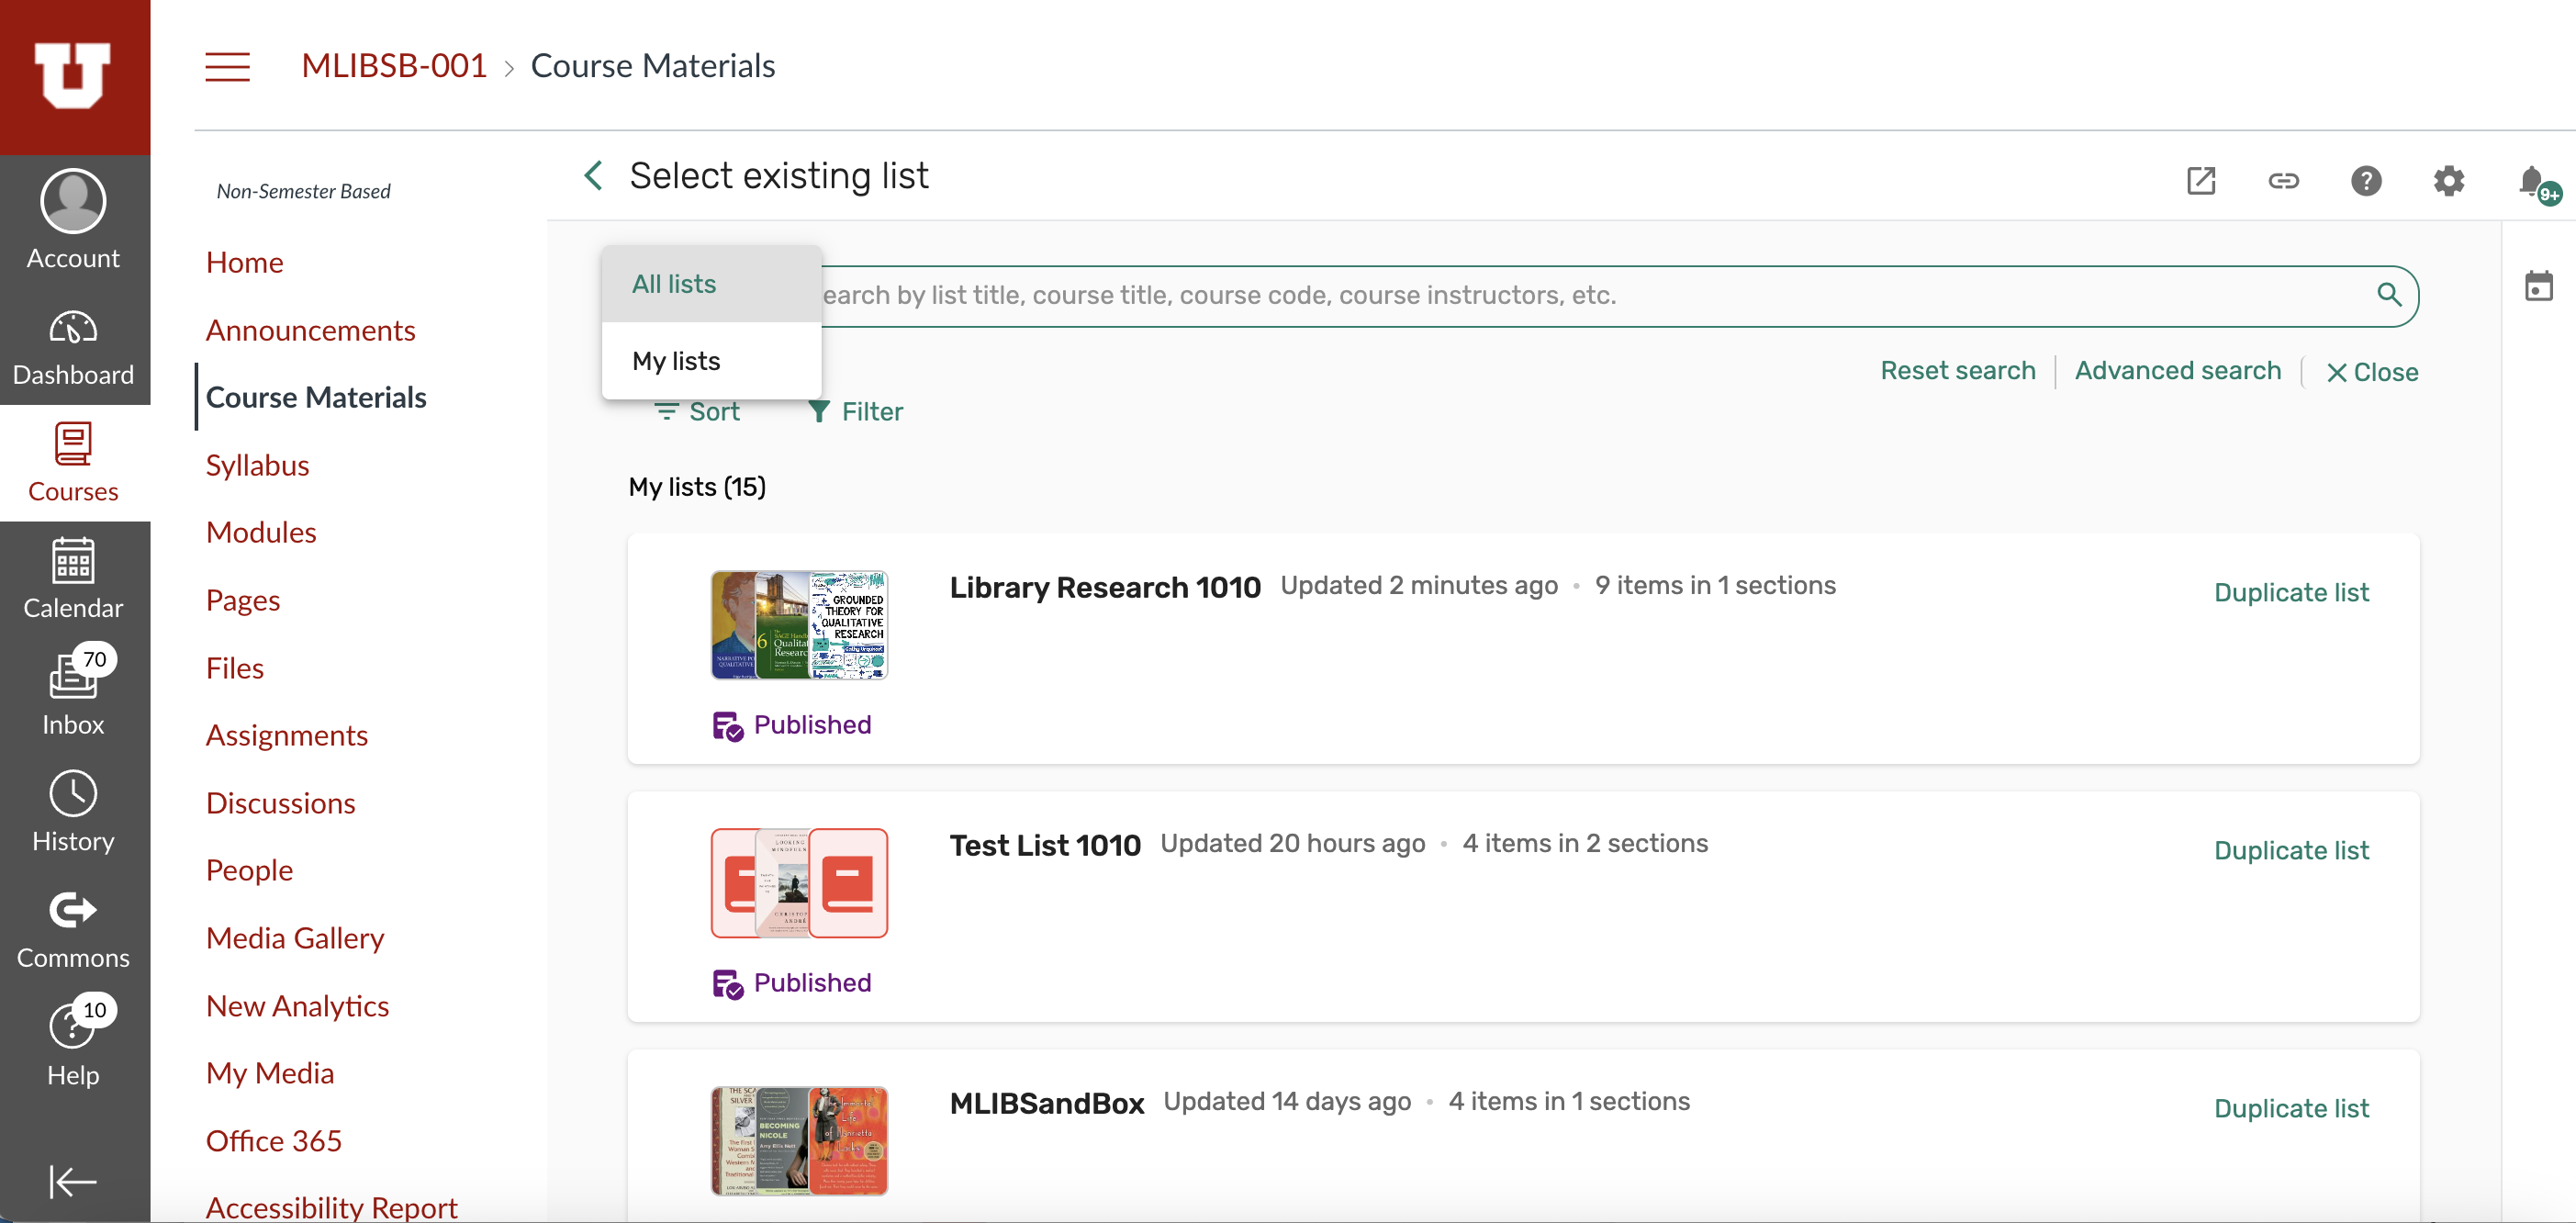
- Click 'Select existing list' to choose an existing list to use in your course

- Lists you have created appear under “My lists”, but you can use the search bar to find lists that were created by someone else
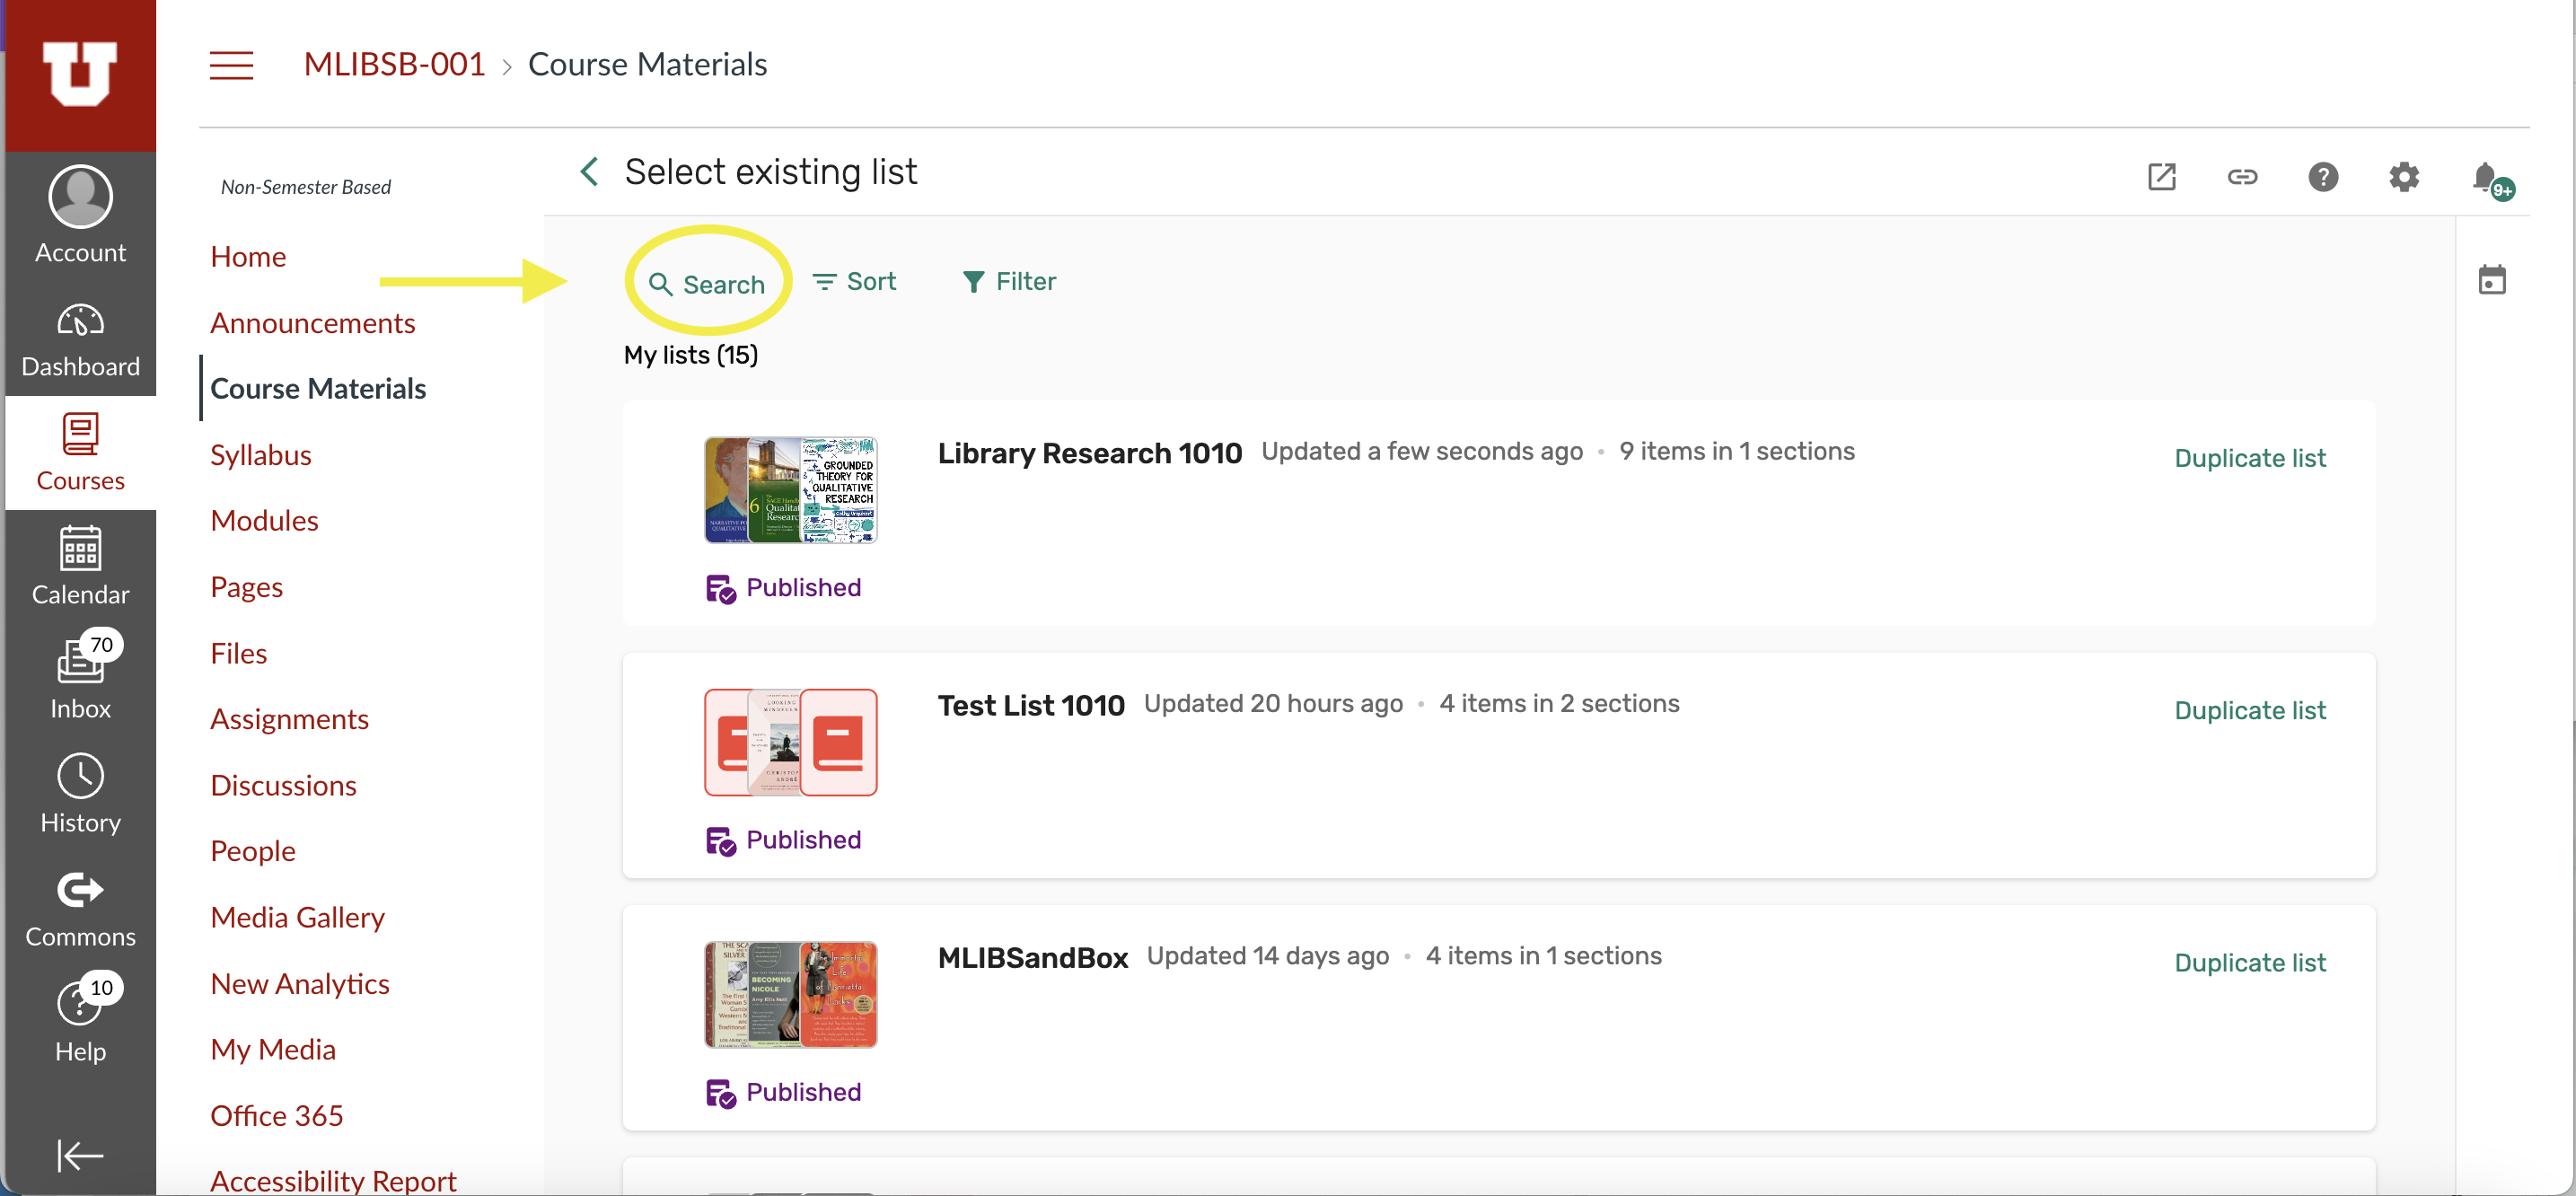
- Use the dropdown menu on the search bar to select “All lists” to search for lists. Select “Duplicate list” to create a copy of the list and associate the new copy to your course
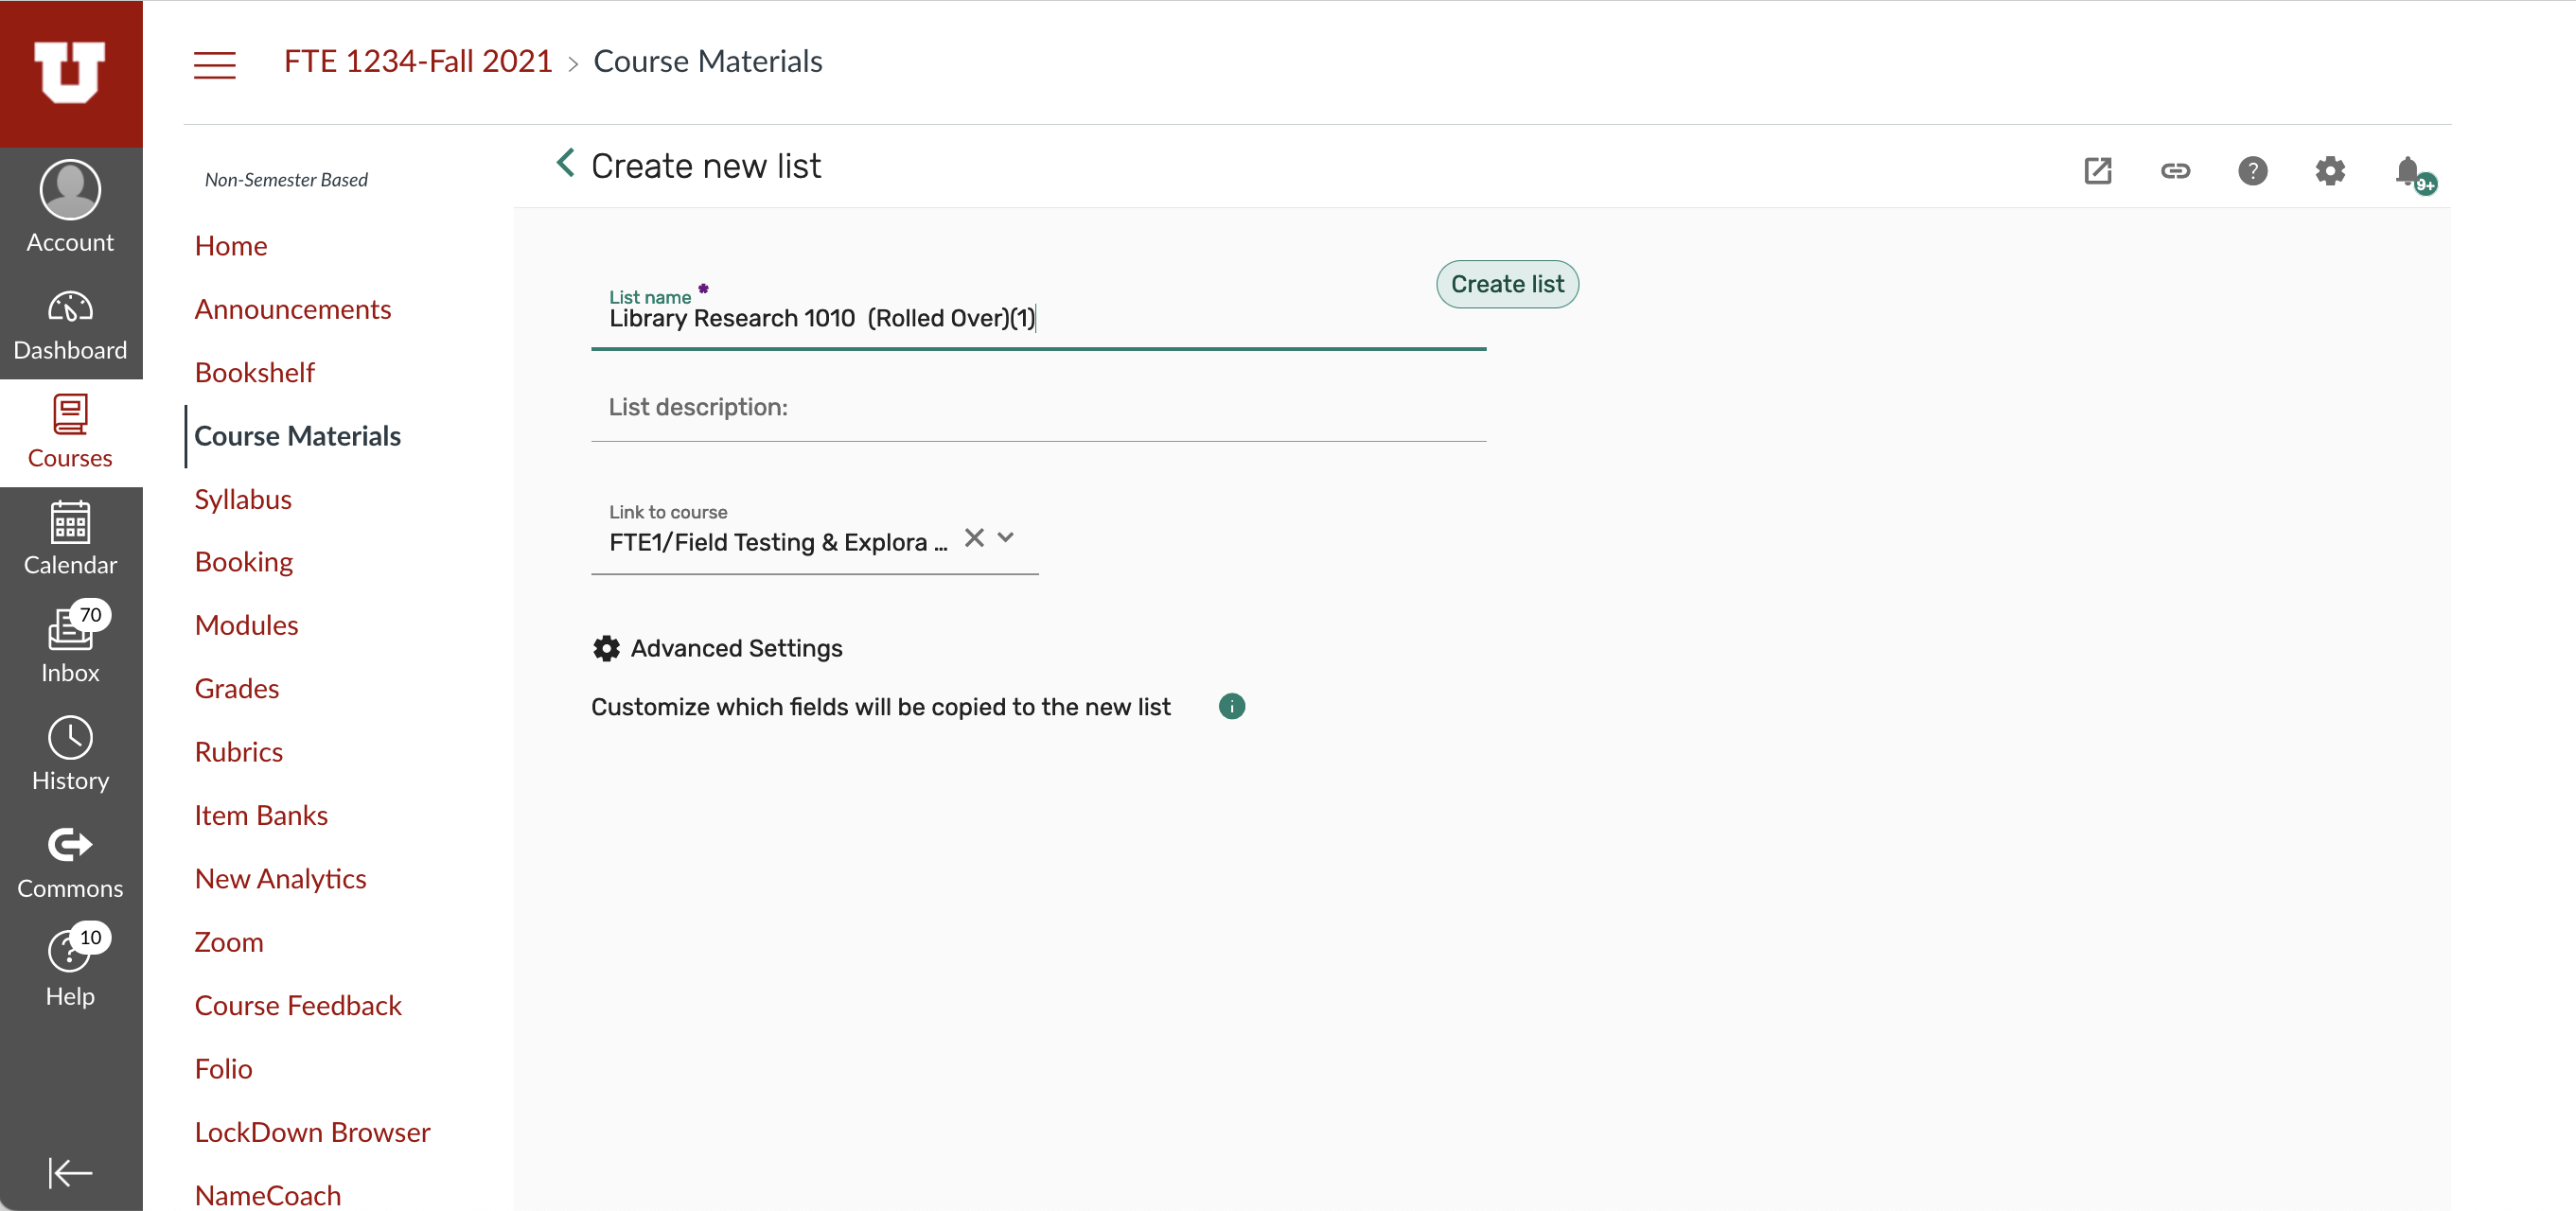
3. After selecting the list you want to use, you can rename the new version before clicking “Create list”
4. Modify your rolled over list
- Steps 5-8 in the 10-Step Guide will walk you through adding and deleting citations, as well as making requests for items to be purchased or digitized
5. Once you are ready to publish your list
- Click “My list is ready”.
- This will also send your list to the library to be reviewed.
- Any additional citations added to the reading list after clicking this button will automatically be sent to the library for review so that staff can evaluate items requested for purchase and verify the functionality of web links.